I learned a lot about my Carbon Fiber Glasair Sportsman by building it in the factory two-weeks-to-taxi (TWTT) program, where it was initially put on trike gear and then switched to amphibious floats before completing its Phase One Flight Testing. The main gear legs were drilled for both nose dragger and tail dragger configuration and the cables for the water rudders double as steering cables for the tail wheel, so the plane can be flown in all three configurations.
Glasair installed the floats but I was not involved in that process, so my initial education did not extend into float installation and maintenance. I had never owned (nor even flown) a floatplane prior to this one, so it was all new to me. Over the ensuing years I did what I could to learn about rigging design and maintenance and I ultimately determined that not only could I improve my rigging maintenance, I became convinced that I could also improve its design.
On a visit to the Clamar factory in 2015, I saw Clamar’s newest model 2500s with the fluted bottoms. My 2500’s had the older style smooth bottoms which were very difficult to unstick from glassy water conditions. Clair Sceli, the founder of Clamar, had just mounted the new floats to a Glasair Sportsman and was to begin testing the following day. I spoke with him a year later and found that they were producing only fluted bottom 2500s because they performed so much better than the smooth bottoms and they were substantially lighter because they could remove some of the structural material without sacrificing strength since the fluted bottom design is inherently stronger than the smooth bottom design. So, I immediately ordered a pair to replace my floats, even though they were only 5 years old and in perfect condition. Clair happily accepted my offer to trade them in.
I read everything I could find regarding the design of float rigging, dealing with the principal issues of (a) how far apart the floats should be from one another, (b) how high the fuselage should be above the floats, including prop clearance from the water, (c) the appropriate amount of “throat” or angle of aircraft longitudinal axis to float longitudinal axis, and (d) the position (fore and aft) of the floats relative to the fuselage. Although I read from many sources, much of the information is summarized here.
If you ask your local A&Ps about float plane rigging geometry, you’ll likely be disappointed with their lack of knowledge. That’s because most, if not all, of their experience will be with certified aircraft where the rigging is designed and built by the float factory and the mechanic simply bolts it together, never having to know anything about why it was made the way it was. When I built my Sportsman, there were very few that had been put on Clamar floats (Glasair had previously used Montana floats). And, as it turns out, there were a few different iterations of the rigging, whereby the Glasair factory was specifying ever smaller throats to try to get more cruise speed. One of the first Sportsman’s on Clamar’s had a throat of 3.7°, mine was 2.9° and since then, they’ve generally been at 2.7°.
Based on what I read, and some of the difficulties that I was having with my old floats, I spoke with Clair about cutting the new float rigging different than my original floats, increasing the throat and moving the floats more aft. Although Glasair knew they were sacrificing some takeoff performance with the reduced throat, it was unacceptable to me, and I also found the CG of the empty amphibious float to be far too forward, even more so than Glasair thought when they installed the floats (more on that later). I drew up a design proposal and Clair ran it past his rigger and they both agreed it was worth a shot. In their words, I was “putting the word experiment back into my experimental aircraft.” Fortunately, I couldn’t be happier with the results.
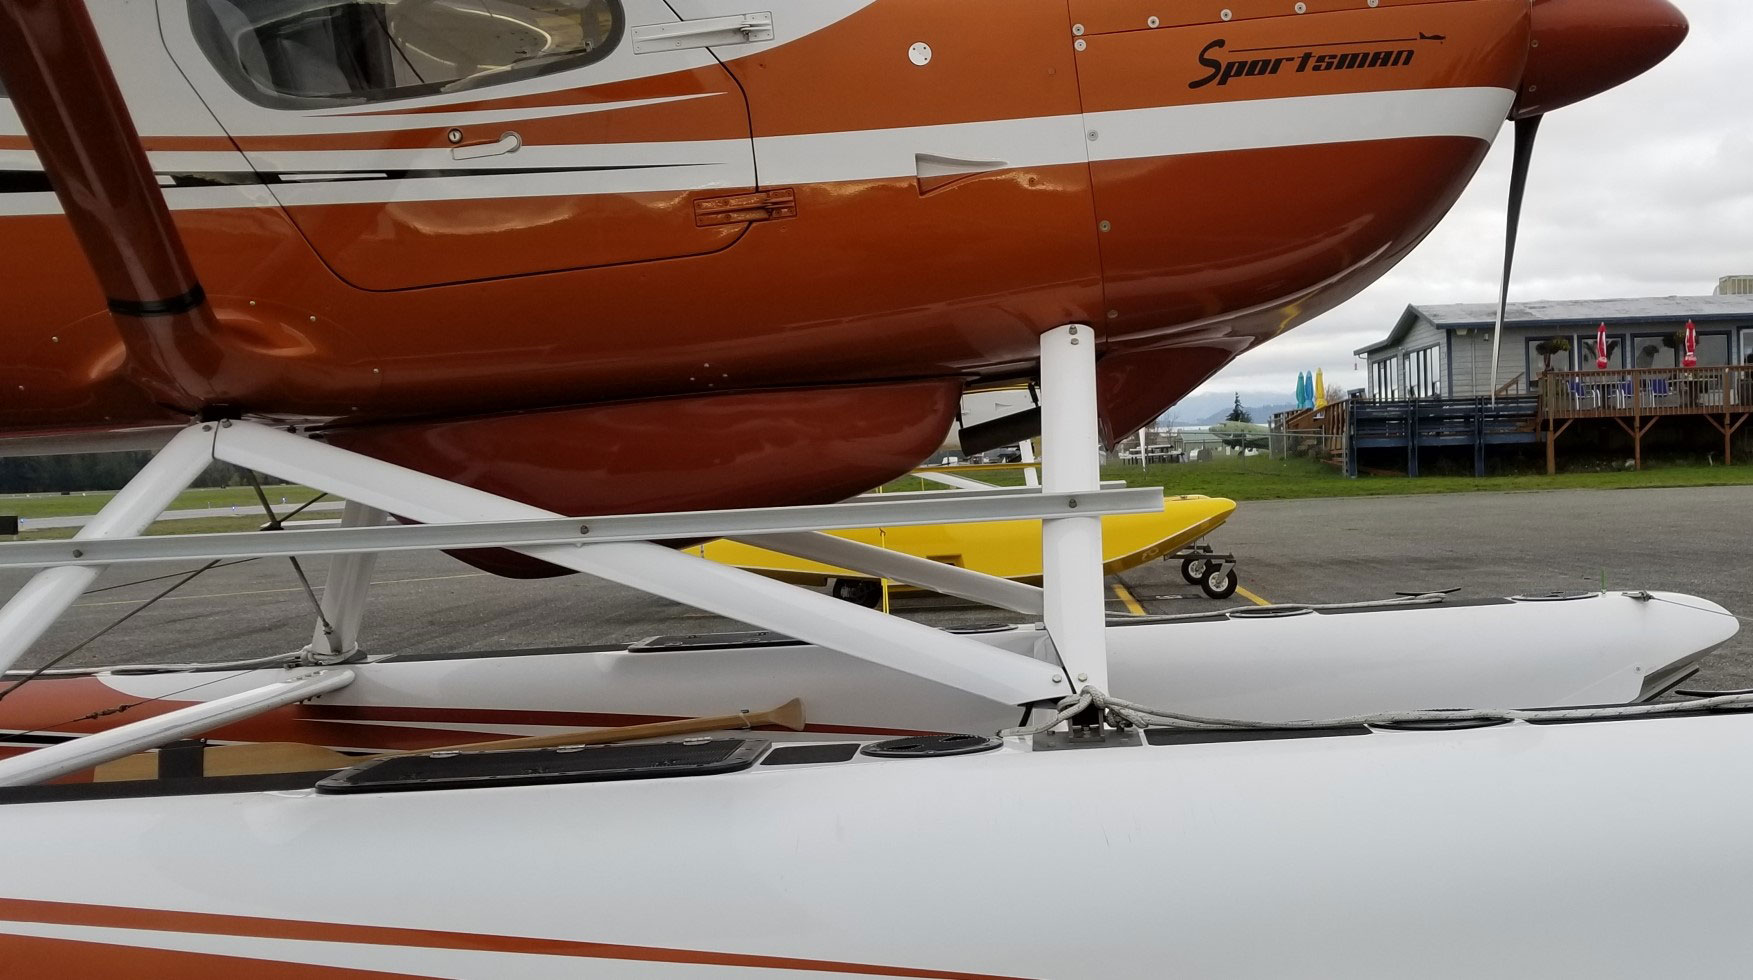
I did not have them change the spreader bars at all, as the plane was reasonably stable in high speed turns on the step. But I had them change the lengths of all six struts. The angled strut was shortened in order to move the floats back relative to the fuselage. The rear strut was lengthened to keep its attachment point at about the same height above the floats despite it being angled more forward (think rotated lower) due to the shortened angled strut. By not lowering the rear attach point, prop clearance off the water was preserved, and it was enhanced to 18″ (on an 83″ prop) by increasing the throat with lengthened front struts. The Clamar manual references the Edo Rule for throat angle as being an interpolation between 8° for 85 horsepower aircraft and 2° for aircraft with 300 HP. Lycoming says my IO-390 makes 210 HP, so the math says I should have a throat angle of about 4.5 degrees. The new struts brought the throat up to 4.2° from its previous 2.9 (so I’m close to matching the Edo Rule now) and it also moved the floats back 3.5 inches relative to the fuselage, thereby appreciably moving back the empty weight CG. As a result, I now get off the water (at 2650 pounds gross weight) much more quickly at 32 KIAS instead of the former 42 to 44 KIAS. The increased throat was thought to be counterproductive to cruise speed, but moving the CG more aft was able to more than make up for the increased throat, so cruise speed has increased by approximately five percent, thereby giving me the best (better?) of both worlds.
When you build your aircraft at the Glasair factory, they provide you with an Excel spreadsheet template that is used for weight & balance calculations. On the amphib spreadsheet, it showed the “arm” (distance from datum to wheel axle) for the nose wheels and mains to be 3″ & 117″ respectively. I don’t know where these numbers came from, but I suspect that it may have been something that was originally measured for the Montana floats, and the numbers simply hadn’t gotten changed for the Clamars. I came to this conclusion based on two things.
First, I measured the arm on my installation, and with the fully-castering nose wheels in their furthest aft position, I couldn’t get the measurement any greater than 13/16 of one inch, nowhere near the 3″ on the spreadsheet. Second, the spreadsheet showed an effective wheel base (distance from front axle to back axle) of 114″ yet the actual wheelbase measures 114.75″.
As a result of these two errors in the spreadsheet, my empty CG, which was already more forward than I would have liked, moved even more forward when I corrected the math errors. This fact, coupled with both the Edo Rule and the Wipaire Rule begging for the floats to be moved back, strongly influenced my revised rigging dimensions. Moving the floats back approximately 3.5″ was a relatively small step toward more closely aligning the empty weight bare aircraft CG with the CG of the floats, as it still falls significantly short of that goal (call me chicken). The Edo Rule would have had me move them back quite a ways more and the Wipaire Rule would have me move them back an additional 8″ from their new location! Clearly, these rules of thumb demonstrate a large variance available when working to find the sweet spot for any particular aircraft and float combination.
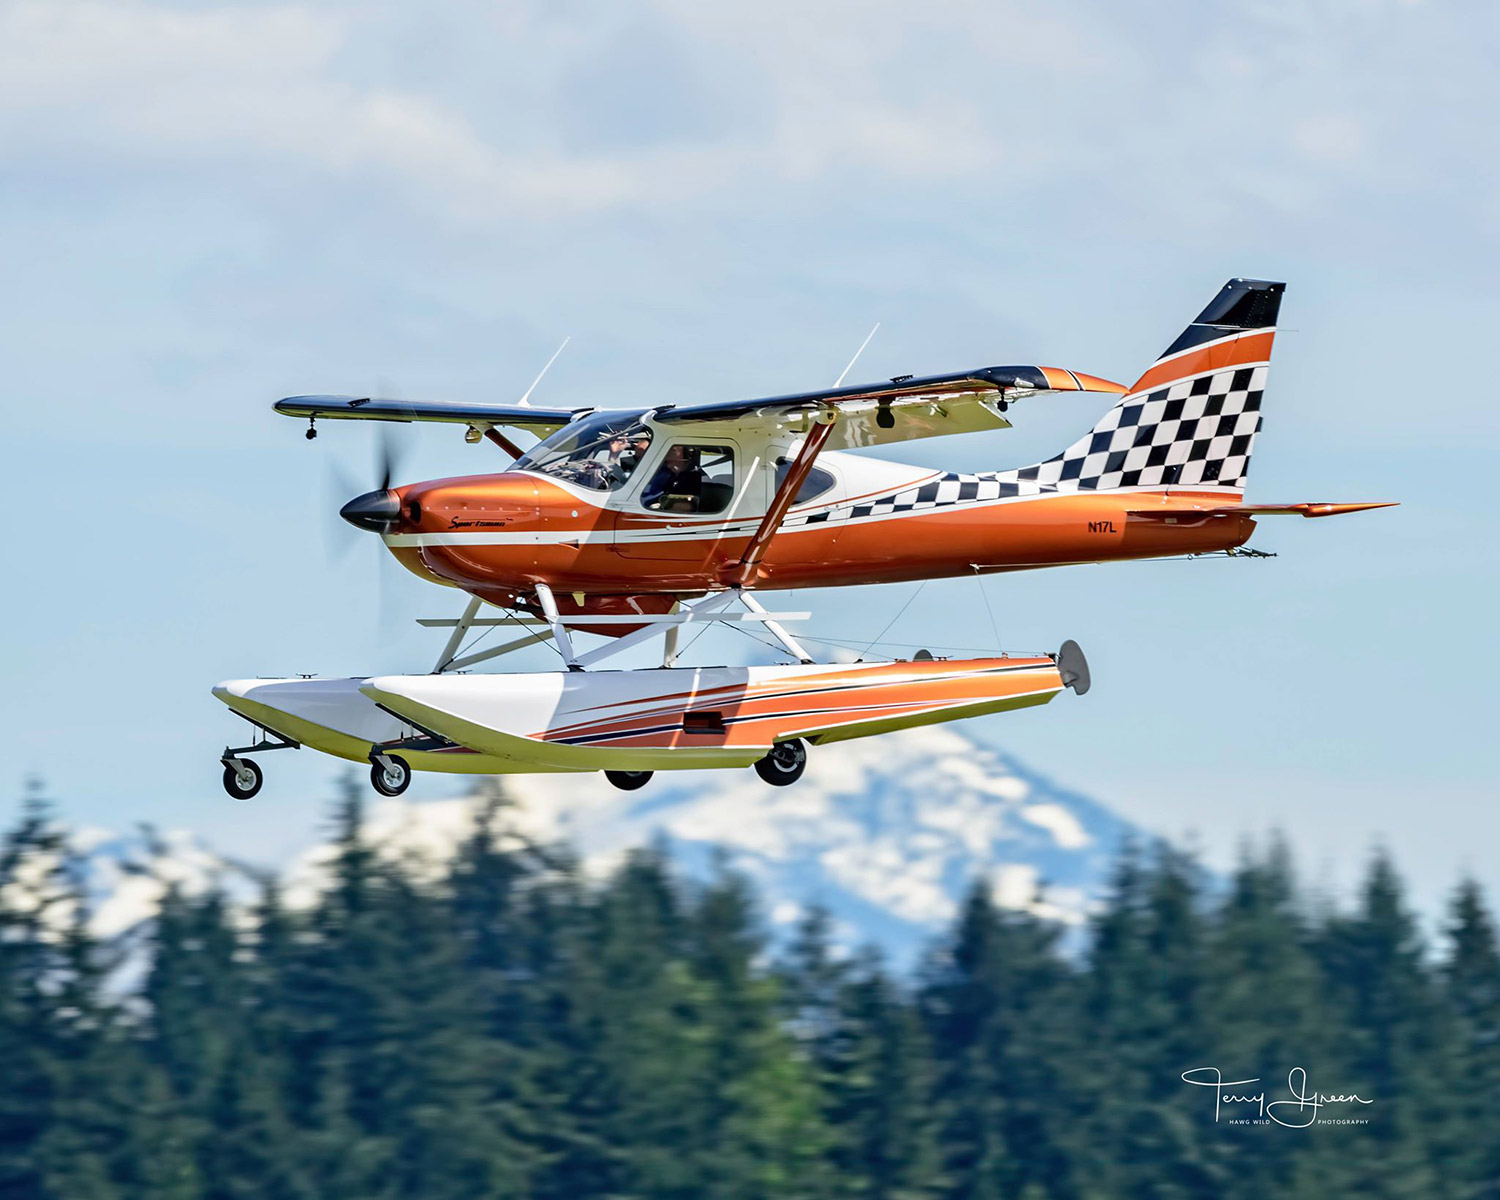
I now have the only floated Sportsman that I’ve been able to find with the front strut angled forward rather than aft. I could certainly go further, but I’m very happy with the results I’ve obtained. A friend just finished his TWTT Sportsman a couple of weeks ago. He and I have discussed/designed an adjustable rigging system that he is hoping to implement on his amphibian next summer/fall so that we may ultimately find the true sweet spot, but for now I’m just having a blast flying a much better float plane than the original.
In the second installment, I’ll convey information I’ve learned about maintaining the float rigging.


