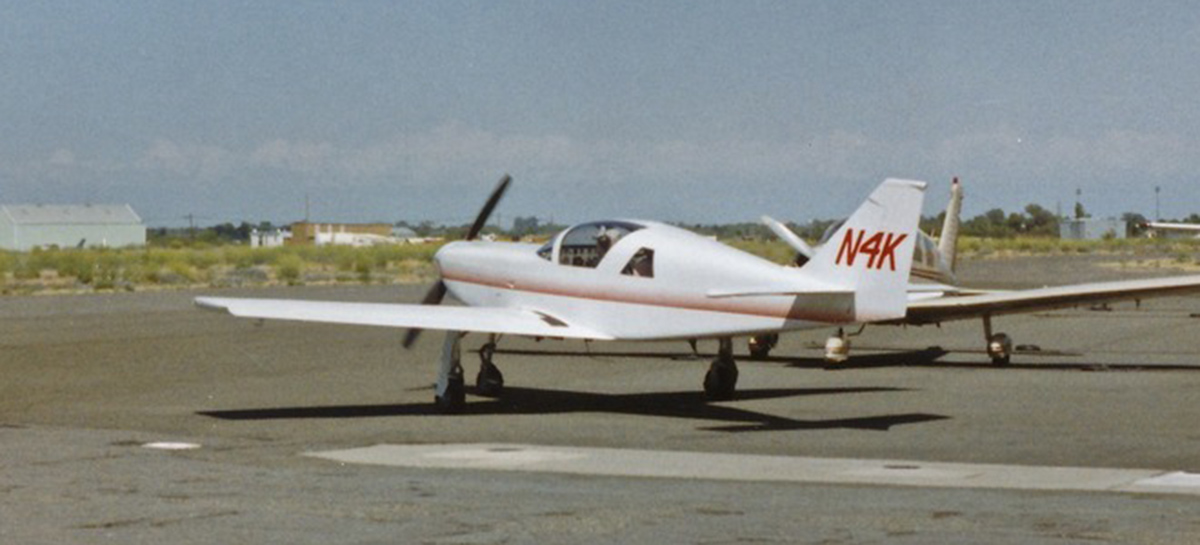
Submitted by Lyle Powell
My Glasair III, “Scoot”, just passed its second birthday since first flight and it continues to change and improve as problems are solved and changes are made. Here are some of them.
Brakes. Chatter of brakes occurred and simulated nose wheel shimmy somewhat. Incidentally this same phenomenon was observed on your prototype when I flew it with bill Sprague three years ago. It’s not severe, but worrisome. The solution was to shim the brake discs on the wheels to remove the axial runout. Mine had about .010″ runout, and were shimmed with brass shim stock to .002″ or .003″.
Simply attach a dial gauge to the fork and read the side runout as you spin the wheel.
Also I found that the torque plates could be installed at the root of the axle, instead of over the base of the axle. This put it about 3/4″ closer to the caliper unit, thus invoking less twist in the torque plate as the brake force is transferred to the axle. The book calls for installation over the axle base instead of under it, but if you turn the torque plate 180 degrees so the bushings face away from the caliper, enough clearance prevails. Now my brakes work better and they don’t chatter. The caliper position is unchanged.
Gear Uplock
I found that the gear would come up all right but not always uplock on takeoff.
This occurs because the airplane accelerates so quickly that it gets past the 140 mph gear operating speed before the 8-9 second cycle time is completed. This then required that I either pull up steeply to prevent airspeed gain, or back off the throttle after takeoff.
I have two hydraulic pumps instead of the hand pump, so I wired the “up” solenoids in parallel so now the “up” cycle time is less than 4 seconds instead of 9 seconds. Pressure is unchanged, as the pumps are plumbed IP parallel, that solved the problem. When Pete Weibens (another Glasair III owner on our field) saw this, he bought another pump from Roy, plumbed it in parallel and solved the same problem in his Glasair III.
This solution was Pete’s idea. It also gives you another reservoir of hydraulic fluid. One caveat-the return fluid is not distributed evenly between the reservoirs and one will overflow-so plumb a connector tube between the top fitting of the two reservoirs so they stay at the same level.
I called Oildyne, the pump manufacturer, and their engineer said these pumps are used in parallel for other applications and it is acceptable practice.
Exhaust Noise
Those 3″ exhaust pipes are real trombones, and the noise level is very high. About a year ago I built another exhaust system to eliminate the problems I had with my rather complex extractor system. Essentially there just wasn’t room enough for a good extractor system. I copied the stock collector type system and used a 2″ overboard pipe instead of 3″, because it’s of very sufficient size.
The difference in noise level is large, and is very significant even with the Bose headsets. The external drag of projecting pipes at less than 30 degrees is very low, so I extended them about one foot out of the cowl flaps to keep the exhaust clear of the belly, so the stainless plates are unnecessary. The 2″ pipes also take up less room in the air outlet and weigh less. I found no loss of power.
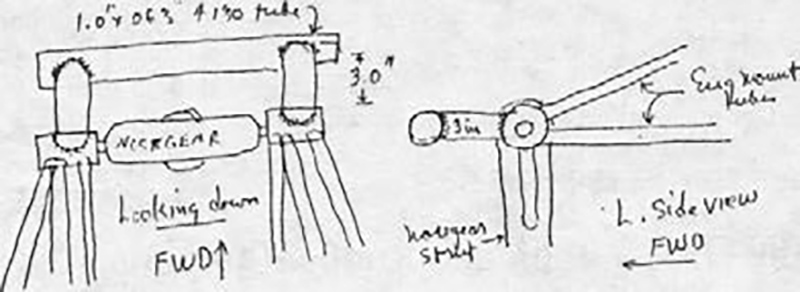
Nose Gear
I noticed how easily the nose gear will bend sideways if you push sideways on the cowling, when taxiing, such as out of a parking place, you can feel the whole nose swing back and forth as you tap the brake to get the nose wheel to turn. In crosswind take offs and landings momentary side loads are put into the nose wheel.
The trunion pins on which the nose gear pivots are forced to bend rather abruptly when this happens, and appear to me to be a failure mode.
To correct this, I arc welded a 1.0″ x .063 tube brace from one trunnion bushing to the other, displaced 3″
in front of the bushings in order to clear the nose gear door. This stiffened the whole engine mount structure against side loads, and the nose gear is much more resistant to being deflected sideways. Steering is easier, this was accomplished “in place” with some heat shielding and a standby fire extinguisher.
Fuel Pump
On two occasions I forgot to turn on my boost pump on take off. the low fuel pressure warning flashed at me and persisted until I turned it on, through the engine and stuttered only slightly. On take off, the flow rate is very high, and the engine driven pump is higher than the fuel tank, so there is a strong tendency for cavitation to take place at the entrance to the pump.
I plumbed a Facet “beer-can” 7 psi pump (probably the most reliable electric pump) in series with the engine pump. It’s located under the seat, below fuel level. This cured the cavitation problem, even with the boost pump off. My high-pressure boost pump is plumbed in parallel to the servo unit. The facet pump is left “on” all the time. Fuel can be pumped through it in the event of a failure.
An incidental feature is that engine starting, hot or cold, is done easily with only this pump operating, mixture rich and throttle cracked.
Two-Speed Pitch Trim
For those of you with electric pitch trim: Pitch trim fast enough for slow flight or approach is too twitchy at cruise. A two-speed switch is now used which uses a resistor for the slow mode. It could have been operated by a relay triggered by gear or flaps, but I prefer a simple switch.
Electronic Ignition
I chose the relatively simple “Electroair” system by Jeff Rose in Chattanooga. It varies only with RPM and MAP. It’s now 18 months old and faultless. It starts at TDC, gives stock timing above 25″ MAP, then advances 2 degrees for each 1″ of decreasing MAP. Above 15,000 ft altitude it gives me 39 degrees advance and a considerable increase in power over the stock 20 degrees lower, CHT slightly higher.
It stops at 30 degrees because it was found that further advance produced no further advantage.
Good features: starting, power retention at altitude, cooler exhaust valves, plugs don’t foul and no moving parts. If you install it, be sure to remove the magneto drive gear as well as the magneto-this is important. I’ve retained my left magneto.
Tow Bar
The tow bar was always either in the way, rattling behind me or acting as a potential missile in turbulence or accident. I made a collapsible one out of 1/2″ steel tube that fits vertically on the wall behind me, held by elastic straps. It is easily accessible even with baggage, and safe.
Moving Map
For those of you who haven’t been exposed to this—beware. You’ll never be the same again. Mine is an Argus 3000. It’s great! It is so different from navigating with raw data that you’re quickly spoiled. It isn’t legal for approaches IFR, but as a supplement it makes them a piece of cake. It gives you the graphic picture of looking down on your self with all the airports and navaids displayed around you. Be sure to put it in front of you-not off to one side or down low.
This airplane has been such a and good luck with your new GlaStar. We’ll see you in July.
P.S. One other one. As you know, those Bendix rotary ignition switches are frequent causes of ungrounded mags. I replaced mine with two simple toggle switches and a guarded starter button. I feel much safer.


