Written by Jim Dutton

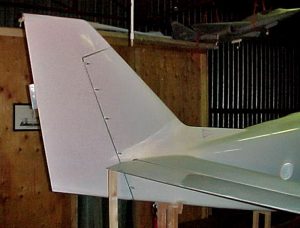
When I reviewed the rudder assembly instructions, I thought there must be an easier way to install the three foam ribs, the shear web extension and the close-out laminates on the inside of the top edge of the rudder. After thinking about this for a while, I made the following changes. The net result of these changes is the additional weight of two laminates of bid on the aft side of the shear web extension, a thin Qcell/resin mixture on the foam ribs and the overlapping laminates inside the top edge. Not much weight gain and a lot easier than prying the joined skins apart to make these installations. The skin with the rudder shear web is the “bottom skin”, which is normally weighted down on the table.
Advertisement
Prior to closing the rudder:
- Install the three foam ribs on the bottom skin; mark their positions, sand them for proper fit between the two skins, bond them to the bottom skin with a stiff Qcell/resin mixture and seal them with a thin Qcell/resin mixture.
- Install the shear web extension. Make up a pre-cured laminate as specified in the instructions, make enough for fabricating the shear web extension and the counter weight bulkhead. Trim a piece of the pre-cured laminate and fit it to the shear web extension area using the top and bottom skins as guides. Radius both sides of the shear web extension/bottom skin joint with a thick Qcell/resin mixture. Apply two laminates of bid on the aft side of the shear web extension tying it to the bottom skin and the rudder shear web.
- Mark a line on the bottom skin to identify the position of the counter weight bulkhead, the proper distance from and parallel to the shear web extension. Trim a piece of the pre-cured laminate and fit it to the counter weight bulkhead area using the top and bottom skins as guides. Set the pre-cured counter weight bulkhead aside for installation after closing.
- Fabricate and install the rudder trim tab on the bottom skin trailing edge. It can be bonded on with milled fiber/resin and the squeeze out through the holes can be sanded flush with the tab in preparation for closing.
When closing the rudder:
- Use package tape to accurately tape the two rudder skins together along the top edge from the trailing edge of the rudder forward to the break in the top edge line. This will form a flexible hinge that will not stretch.
- You will be mixing milled fiber/resin for the actuator rib and the trailing edge, Qcells/resin for the foam ribs and laying up four layers of bid to transfer to the inside of the top edge. The length of the bid can be slightly longer than the tape hinge. If you wet out the bid on plastic wrap you do not have to worry about release agents or wax on the overlap joint later on.
- Spread the milled fiber and Qcell mixtures and transfer the bid from the plastic wrap to the inside of the hinged top edge. Swing the hinged rudder halves closed, tape and weight as needed. Use a brush to smooth the inside top edge laminates, working out any air bubbles. Try to make the forward edge as smooth as possible because you will overlap it later with more laminates.
After closing the rudder:
- Finish installing the close-out laminates inside the forward top edge of the rudder. Overlap the fresh laminates onto those installed during closing.
- Finish the installation of the shear web extension. I applied two laminates to the forward face of the shear web extension. Three laminates may be applied to equal the number of laminates specified in the manual.
- Install the pre-cured counterweight bulkhead using the reference line drawn prior to closing.


