Mike Lauritsen from Cleaveland Tool responded to a query re: how to operate pneumatic squeezers. It might be of interest to a builder or two. Pay particular attention to item 3.
I learned a lot by disassembling my squeezer to clean and re-lube it.
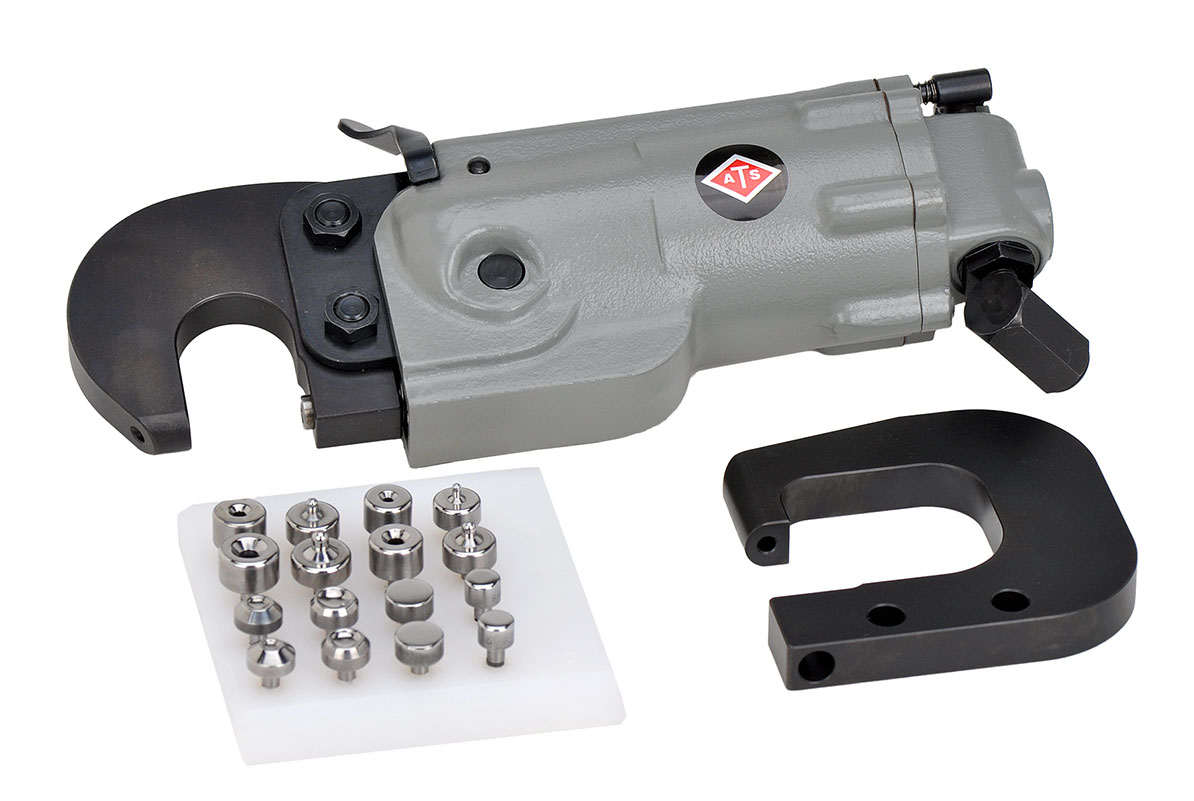
The pneumatic squeezer is a terrific tool but does require some understanding of its set up. It is manufactured for factory production use and I’m sure the operators get on the job training. Squeezers do not come with instructions from the manufacturer but we do have an info sheet we include. Buzz has also written up additional instructions to explain use. Do practice on scrap to become familiar with this powerful tools operation.
A few pointers:
- Always disconnect air before changing dies or sets.
- Never exceed 90 psi. Power is developed through mechanical advantage not increased air pressure.
- Never use air tool oil in the tool. Oil will wash out the grease and ruin leather piston.
- Always drill and deburr the appropriate sized pilot hole for the dimple die. Never use as a punch!
- For Dimpling: Insert male die in top of yoke, female die in the ram, plus a couple of thin shim washers. Slowly operate squeezer to close dies. Carefully rotate dies. Disconnect air and add shims. Repeat until closed dies are just tight enough to be difficult to rotate with finger pressure. Note shim combination used. Add or remove shims to adjust for various skin thicknesses. Practice dimpling. Compare under squeezed and over squeezed dimples. Note the differences in the dimple shape and in the “flat” skin around the dimple. Note and use shim combinations to get desired result in each skin thickness..
- For Riveting: Use the 1/8″ long flat set or 1/8″ long cupped set in the top of the yoke. Choose the correct length of flat set to correspond to the length of rivet being squeezed. Long rivet – Short flat set Short rivet – Long flat set We use the set of 8 ranging from 1/8″ to 1/2″ long. Hardened shim washers are added under the flat set in the ram for fine adjustment. Common washers will work but do squash out and hinder repeatability. The actual setting of the rivet occures during the last 3/16″ of the ram travel – where the squeezer produces power. Practice. This will soon become your favorite method of dimpling and riveting.
–John Top
Follow-up squeezer tip: I fabricated some washers out of very thin aluminum from a discarded Cessna tail skin. They help to get just the right depth for the dimple dies. Sometimes the thin washers are JUST too thick… Just drill a few holes and cut washers around the holes with tin snips.
–Sid Lloyd


