Exterior screws: countersink screw heads deep enough to fill flush with a couple thin layers of glass. Makes for a smooth surface.
– Jim Londo
Exterior screws: On my second Glastar, when attaching the shells to the cage, after filling the hardpoints, I would drill #10 holes, sand through the gelcoat around the holes about the size of a quarter, going down to the glass, countersink so that the screw head is just flush with the glass, then put a layer of glass cloth over the screw head, then fill and sand flush with the rest of the gelcoat. I had a couple of screws pull through the glass and had to repair because I was unsure of how deep to countersink.
–Don Hatler
Exterior seam: fill exterior seam after sanding gel coat down to glass. Put thin layer of glass on, then filler and sand for a perfect finish.
–Jim Londo
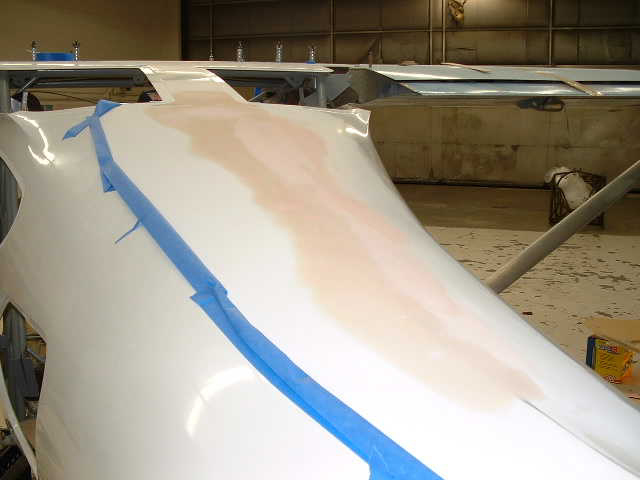
Hull fairing and preparation for painting: Many people were impressed with the gloss of the paint job which we achieved on the aircraft that we took to Oshkosh. This can be attributed to several operations which we perform prior to painting. It is not easily apparent when working with the gel-coated hull but there are slight imperfections in the shape of the hull. These imperfections are caused by several factors such as the bulkhead attachment tapes shrinking which telegraphs the shape of the bulkhead thru the hull, and small imperfections which come from the factory. Most of these imperfections are totally acceptable if you plan to leave the hull gel-coated, however if you decide to put a high gloss top coat paint on the hull all of these imperfections will be greatly magnified and the overall cosmetic appearance reduced.
The first process which we endured was to block the entire hull with a 16″ flexible blocking/sanding board with 80 grit. This process removes a considerable amount of gelcoat possibly enough to offset the weight of the paint, care must be taken not to sand entirely thru the gelcoat. The next process was to apply several layers of epoxy sanding primer, this again was blocked down with 100 grit and all low spots were identified and filled with an epoxy faring compound. This process is repeated with diminishing grits of sand paper until the hull is completely fare and we finish up with 320 grit sandpaper. Prior to painting there must be an unbroken coat of epoxy primer (must not have sanded thru the last coat of primer into the gelcoat).
The paint which we chose was US Paints Aluma Grip/Awl Grip, we recommend that you use only the primers approved for the particular top coat which you plan to shoot.
This process can be very time consuming if done correctly and might not be necessary for a person who would be happy with an average paint job.
I hope this answers your questions about achieving a high gloss hull with few imperfections.
–Danny/GlaStar Component Services


[…] Download Image More @ glasair-owners.com […]