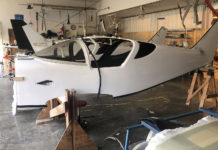
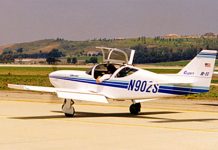
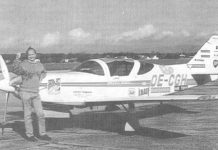
Throughout the building process, my dad and I adopted a strategy of completing as much as possible while the plane was still in my garage. We then planned to disassemble the wing from the fuselage and move everything to the airport in two pieces, where it would be re-assembled for the last time. This approach enabled us to completely install the engine, prop, instrument panel, and all the wiring and plumbing systems ‘in the comfort of your own home’. However, as moving day approached and reality sank in, the magnitude of the moving job became apparent. Still doable, but definitely a lot of work. After indulging in some out-of-the-box thinking and planning, we were able to avoid disassembling and re-assembling the two halves altogether, by moving the entire package to the airport in one piece. Here’s how it went, in case anyone else is considering this approach.
Everything we knew suggested it would be impractical to transport my Glasair II RG in one piece, mainly because it would be way too wide to travel the 16 miles of public roads to the airport. The wingspan cleared my garage door opening by a mere inch, and I had doubts it would even pass between the large trees that lined my driveway to the street. So we had carefully designed and built everything that passed between the fuselage and wings such that disassembly would be as simple as possible (Molex connectors in wiring, couplings in hydraulic, fuel, brake, and vent systems, etc.). Still, once everything was installed, it became apparent what a time consuming chore moving it this way was really going to be. So we decided to do some quick checking, to see if the one-piece option really was infeasible. Boy were we glad we checked!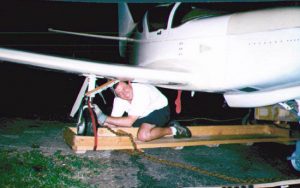
First I laid out the plan and elevation views of the plane on a flatbed, to minimize its overall dimensions. (Orienting the nose 45 degrees produced the narrowest load. Overall height was not a problem). After studying the road maps and plotting a route that would encounter the least traffic and most road width, I placed the all-important phone calls all the jurisdictions on the route (two counties, one city, and one township). I fully expected to be shot down immediately, but to my surprise they all indicated our plan was feasible provided we complied with certain safety requirements: We would have to obtain written permits from each office and pay the required fees (about $15 each). Travel would be restricted to the specified route. Travel had to be during daylight hours, but not during heavy traffic periods (so we agreed to travel at 7:30 am on a Sunday morning). The trailer would have to be accompanied by two escort vehicles, each equipped with ‘WIDE LOAD’ signs, flashing amber lights, and orange flags. In addition, we would have to abide by a myriad of other lesser regulations included in very fine print on the back of each permit. Still, we were more than happy to jump through these bureaucratic hoops to avoid undoing and redoing construction work we had already completed.
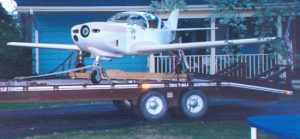 A key hurdle in moving the plane ‘whole’ was a simple one: most flatbeds are 8 feet wide but the Glasair’s main gear wheel base is about 9 feet. This would add a challenge to the loading & offloading steps. Our solution was to put the mains in a specially designed 10-foot-long, box-like, wooden skid. This skid would support the main wheels outside the trailer width, while the plane is winched onto & off of the bed. Once on the trailer deck, the skid would be used to help rotate the plane to a 45 degree ‘heading’. This rotation would serve several purposes: (1) it would reduce the load width from 23 feet to only 18 feet, (2) it would position all three gear securely over the bed and (3) it would locate all three gear near the tie-down rings along the edge of the deck.
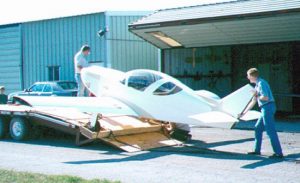 I’m happy to report the entire operation went virtually without a hitch. Our Glasair is now sitting pretty in her proper home… the hangar. In hindsight, I’m convinced the keys to this successful mission were good planning and good people. My dad and I planned every detail carefully and that really paid off. And many thanks go to my new hangar-mate, Mike Rogers, who provided all kinds of help (again!). Obviously, finding a willing and qualified driver was also key. And several friends well-versed in the skills of rigging and hoisting also came in handy on move day. I could have hired a professional trucking company to handle everything, but it would have been five times the cost. Besides, the do-it-yourself approach provided a lot more fun to a lot more people. Considering the number of volunteers we had on move day, we probably could have lifted her onto & off of the bed literally ‘by hand’. But I was afraid someone would crack a good joke at a critical moment and….forget that plan!
I’m convinced the one-piece approach saved man-hours versus the two-piece approach for us, since so much of our construction was completed prior to the move. This may not be the best approach for everyone, since so much depends on your level of completion and your preparation. But I would definitely do it this way again. If anyone else is considering a similar approach, feel free to give me a call. I have a lot more pointers that could save you time.

