Superior Air Parts invited me to the two-and-a-half day XP-Engine Build School at their Coppell, Texas facility, but since I hadn’t purchased an engine, I observed a technician build an XP-400 while a paying customer assembled an XP-360 on the adjacent bench. Although the course “tuition” of $1000 adds yet another steep price tag onto your project, the experience is priceless for someone who hasn’t previously built an engine.
Superior’s XP-360 and XP-400 engines are popular choices for GlaStar and Sportsman builders.
Most homebuilders build our airframes with very little help beyond family and an occasional friend.
Some of us build our avionics panels, wire and plumb the systems, paint our handiwork, and sew the upholstery. But, very few of us build the engines upon which we so depend. Adding engine building to the list of a homebuilder’s accomplishment may soon become as common as wiring an avionics panel thanks to Superior Air Parts recent re-establishment of their once highly successful Engine Build School. Buy one of Superior’s XP-engines and you’ll have the option to build it under the careful tutelage of one of their experienced technicians. Or, if you prefer, you can watch a technician assemble your engine while you document the entire process in photographs.
Class is back in session
The closing of the Engine Build School with Superior’s bankruptcy in 2008 disappointed homebuilders, but the school is back and new graduates are already busy installing their engines. Rick Hayes-Roth needs two engines for his Velocity V-Twin and came to the school to learn more about the engines as he assembled one himself.
The school fully engaged the facility’s capacity for four concurrent engines builds before the company’s bankruptcy. Now, as they revive the school, the first two “prototype” classes each had only one customer/builder, but it’s not hard to look a few months into the future and anticipate full bookings year-round. The curriculum closely follows Engine Build School 1.0— two-and-a-half days of hands-on learningbut Superior is carefully listening to its students in an effort to tweak the program and cut down on non-productive time.
The XP-Engine Build School provides an excellent opportunity for homebuilders to get a good understanding of the engine they are putting into their airplanes and the more engine-savvy or brave builders will gain the knowledge and hands-on experience to perform engine maintenance.
Introductions
I arrived at Superior’s facility just north of the Dallas-Fort Worth International Airport at noon and met classmates Louise Hose, Rick Hayes-Roth and Arturo Jaen, instructors/ engine builders Darrell Ingle and Abel Martinez, Superior’s customer service manager Brent Henman, and Dennis Henson, the company’s director of production.
Once the obligatory introductions and a quick overview of the upcoming two-and-a-half days were completed, we recognized that one can’t learn on an empty stomach so lunch for all of us was the next order of business. During lunch, we learned a little more about everyone’s story–why each student was taking the class, the employees’ history with the company, and the work history of our
instructors: Darrell had worked at American Airlines and Lockheed Martin and holds an A&P certificate. Abel, the company’s most experienced engine builder, has been with Superior since 1997. When students like us aren’t slowing him down, Abel can build an IO-360 engine in a day-and-a-half.
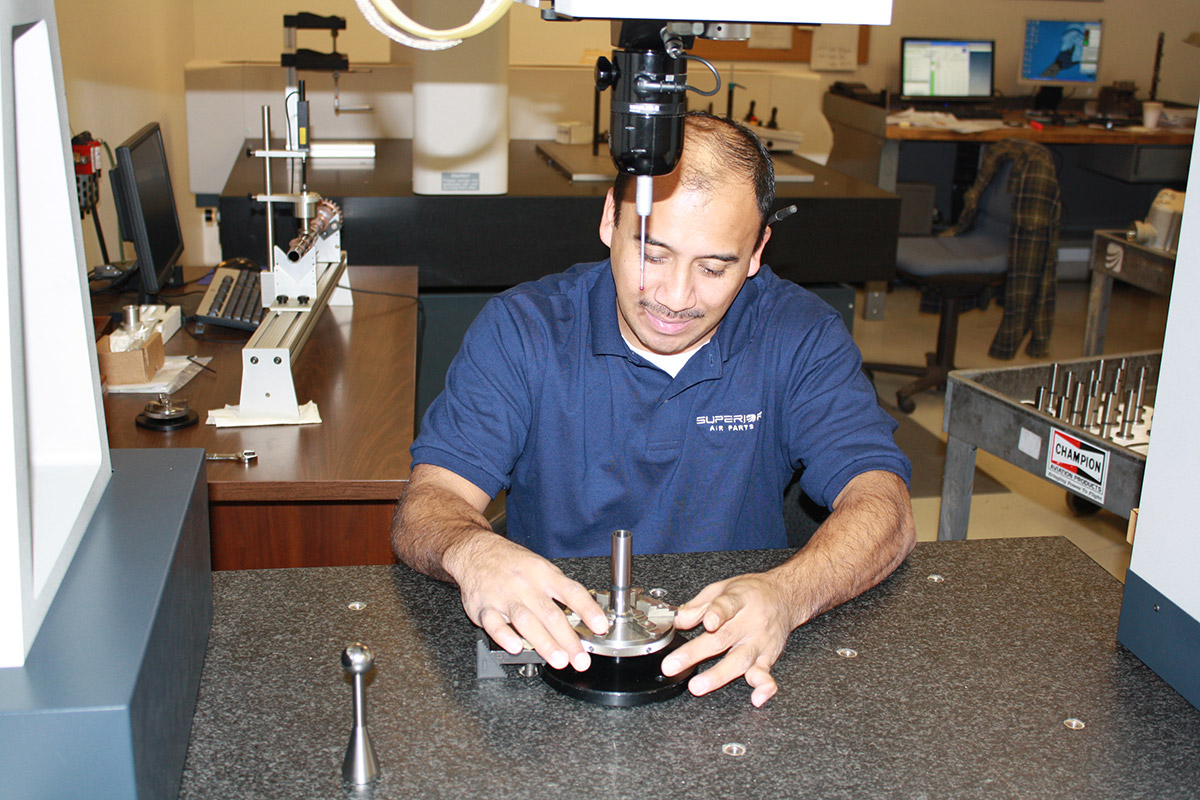
A PowerPoint presentation about Superior’s company history, its product lines, the major parts of the engine, and the tools and materials needed for assembly educated us while our lunches digested. A tour followed, featuring their well-stocked part warehouse and the company’s Quality Assurance (QA) department, where batches of incoming parts are tested for conformity to quality standards. Any parts that fail inspection return to the suppliers. The QA employees were a busy group as they used various measuring tools to determine whether engine parts met Superior’s specifications.
Superior uses in-house engineering but suppliers produce all parts to the company’s specifications and quality standards. By all appearances, the company devotes a lot of time and floor space to ensuring that parts sent by the suppliers are up to snuff. When asked about consumer preferences regarding the in-house production of parts compared to using suppliers, Superior’s Chief of Engineering and QA explained that their system benefits their customers because Superior can easily reject any parts below its standards without having invested money into their manufacture. The key, he said, is to maintain tight control over the quality control process.
We made our last stop at the engine test-cell.
Previously, Superior used a remote facility for test-runs on completed engines, but now all finished engines, customer- or technician-built, are attached to a water brake dynamometer and test-run for about 1.2 hours on-site.
Engine assembly—the bottom end
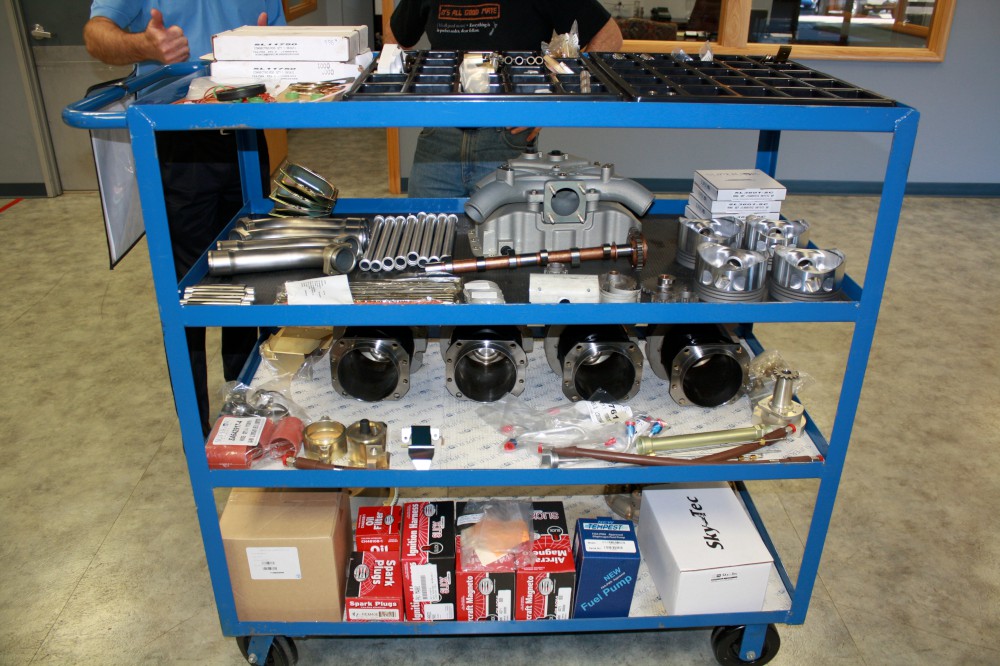
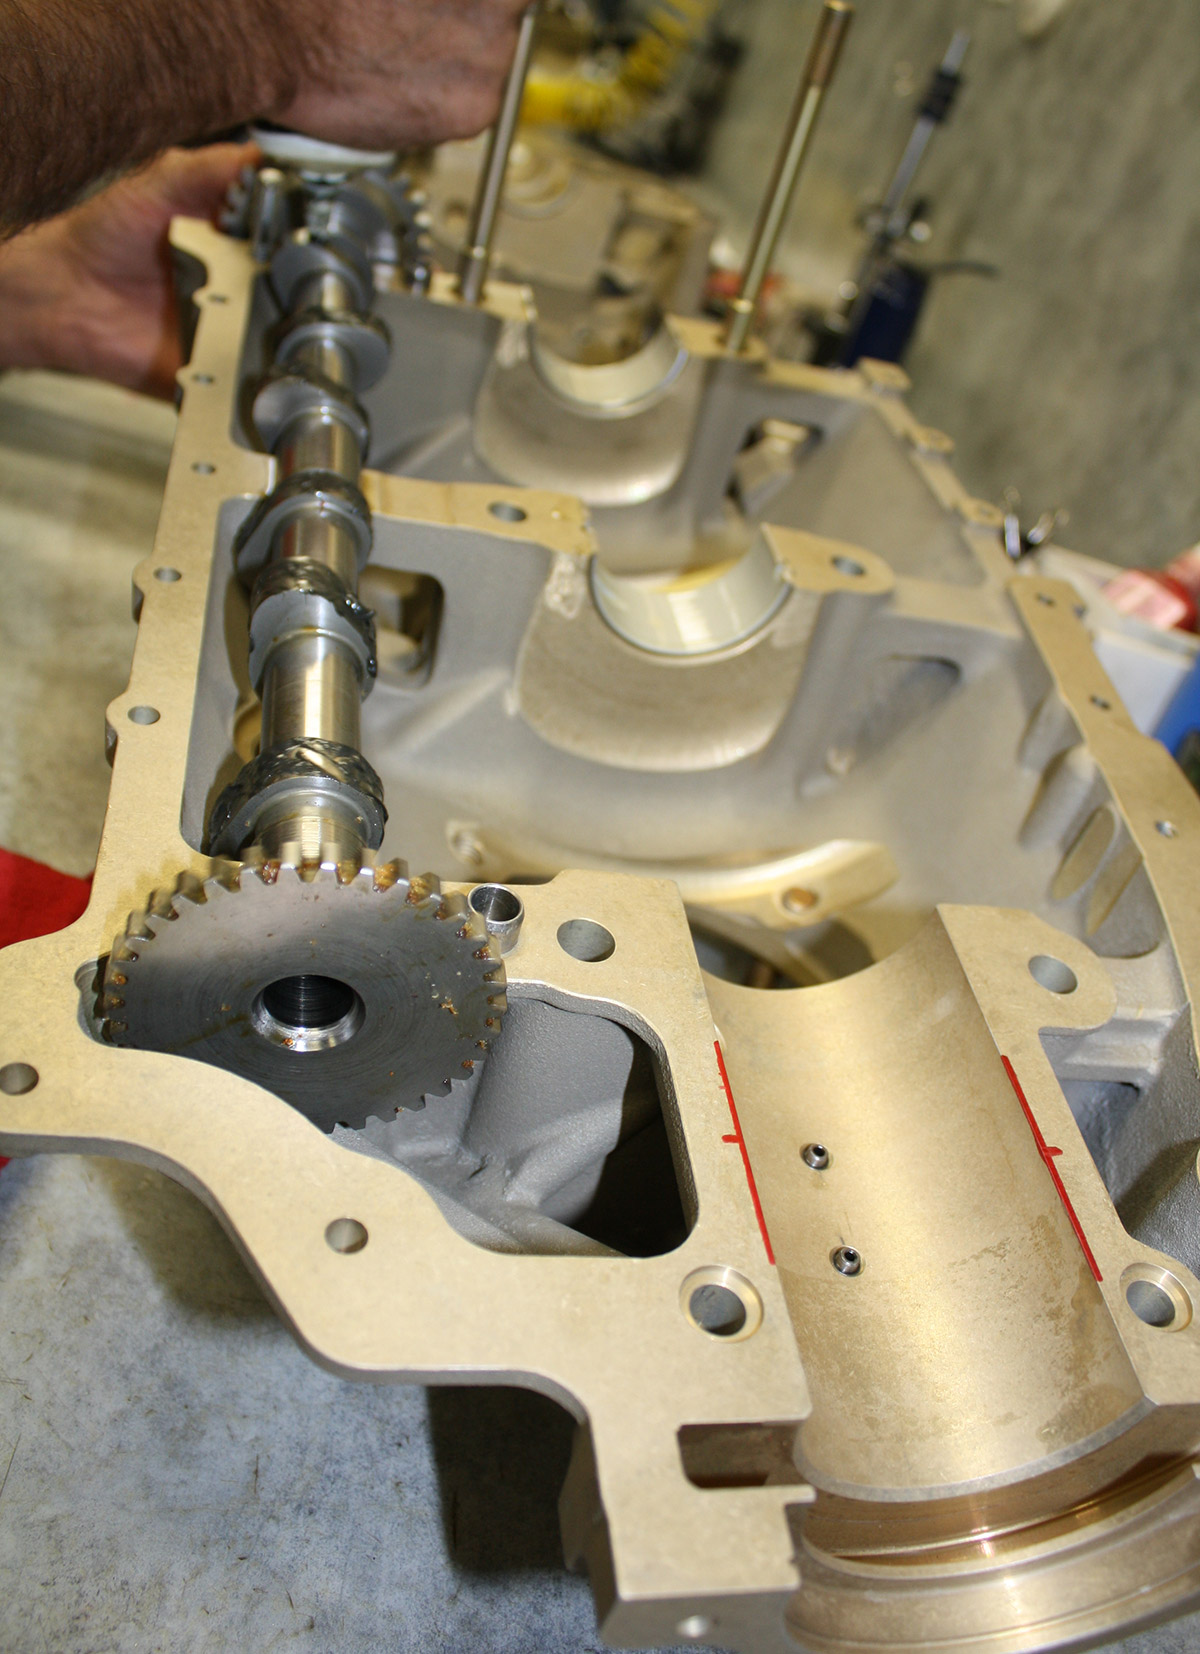
The engine assembly area resembles a showroom more than the typical shop floor one would expect—it’s well lit, well organized, clean, and spacious with four engine build stands bolted to the floor. All parts for the engine are “picked” from the warehouse before the students arrive, neatly organized onto a large rolling cart, and ready for assembly. The crankcase had the cylinder studs and some of the through-bolts already in place.
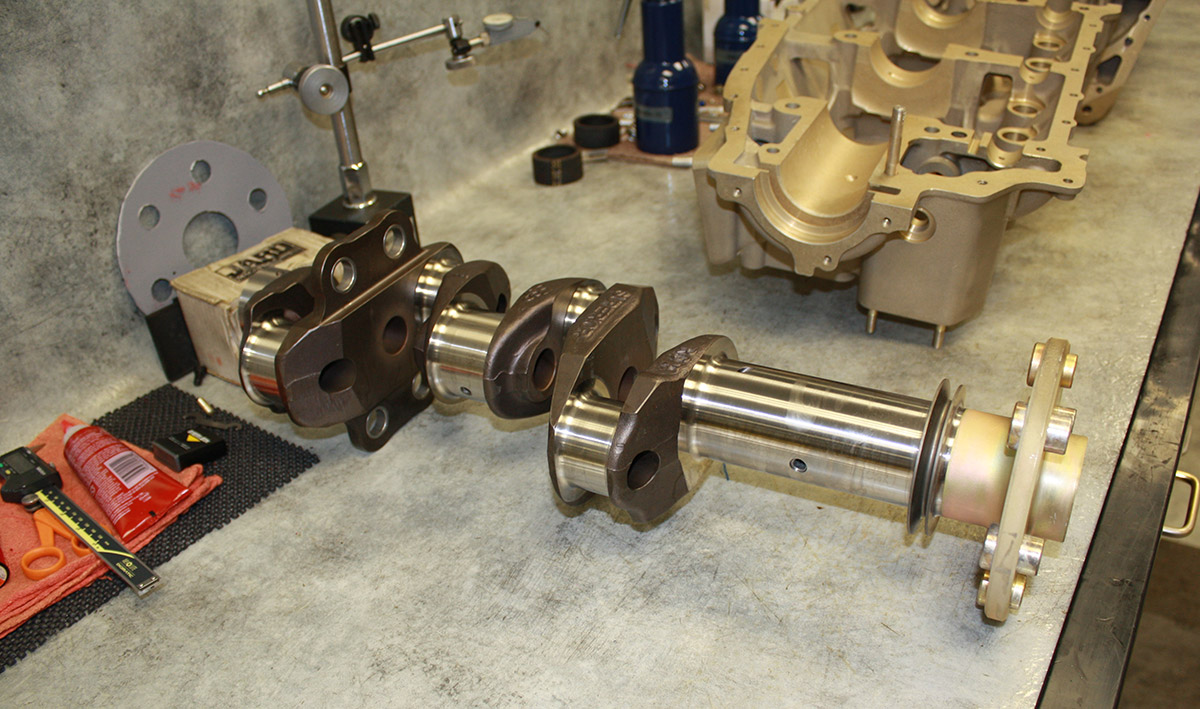
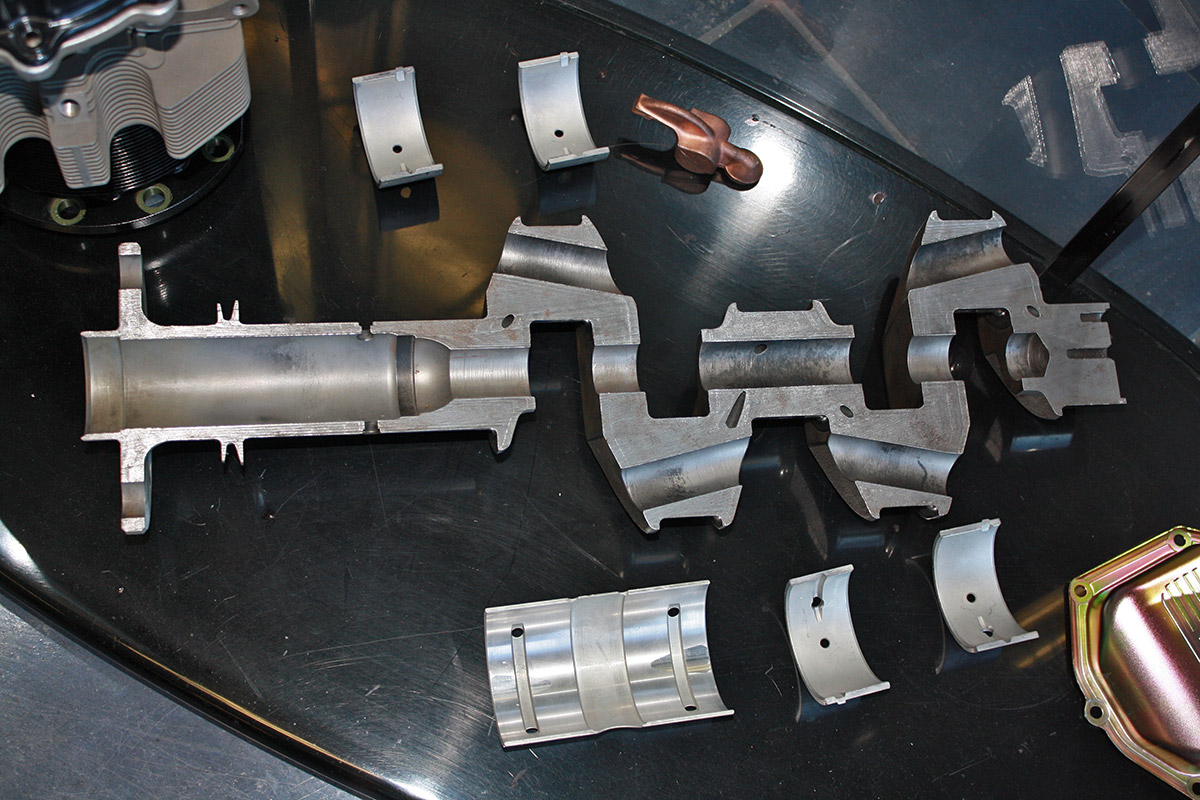
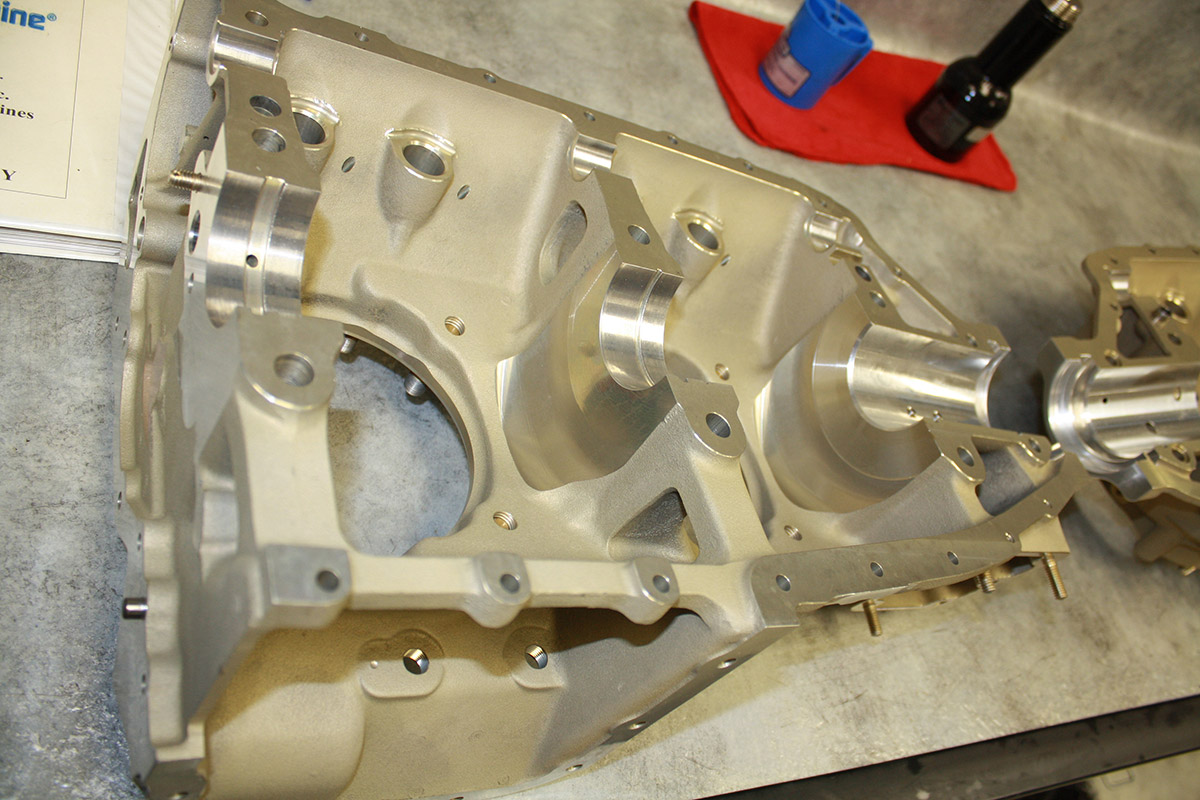
The process begins in earnest with another inspection of parts. An engine assembles around the crankshaft, so we began examining visually and by running fingers over all of the crankshaft surfaces for any burrs. Superior’s cranks are made using the Electro Slag Remelt (ESR) process, which produces a tighter steel grain structure than the industry-standard VAR process, according to Superior. They proudly say that no SBs or ADs have ever been issued for Superior’s cranks. Customers and technicians also inspect the case at this time, ensuring clear oil galleys, no burrs, and that the main bearing retention dowel is at the correct height. The technicians then check the fit of the crankshaft and camshaft to the case by placing them with the main bearings in place and confirming that clearances are within spec. Positions of each bearing surface are marked on the bearings for later reassembly and everything is recorded in the engine’s build log.
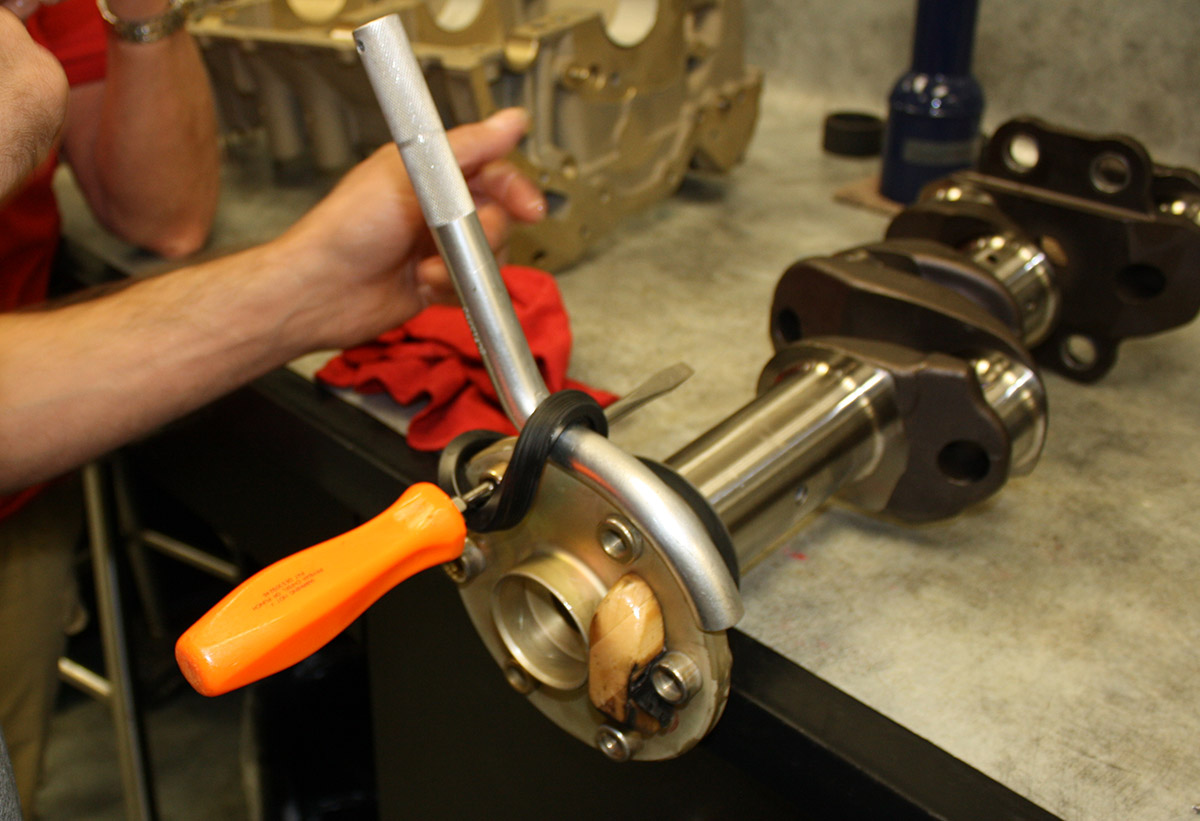
The nose seal is installed over the propeller flange using the first specialized tool. Our technician, Abel, made a small wooden wedge that helps the rubber nose seal slide over the lugs. The operation is very quick, but without that wedge he would need an extra hand to free the seal from the protruding lug. Everything is liberally lubricated, but the nose seal needs to be dry in order to make a good seal. So, after the seal is stretched over the flange, it is cleaned with acetone and its spring installed. The crankshaft is then attached flange-down to an engine stand built with rollers and pins that attach it to bushings built into the shop floor.
Next, the connecting rods go through the same visual and tactile inspection before the bearings snap in and the rods are assembled around the crankshaft. Everything is pre-lubricated with a mix of straight mineral oil and STP, which makes the mix more viscous sticky. The machined connecting rods, made from forged VAR SAE 8740 steel, are then statically and dynamically balanced.
Once in place, the builder torques the connecting rod bolts and checks the clearances with feeler gauges. The fit of piston pins is also checked. Finally, one installs the main accessory gear on the back end of the crank and bends a keyed washer to safety the nut.

Interestingly, even the bolt threads are lubricated prior to assembly. I asked whether this was OK, and Superior’s chief of engineering explained that all torque values are specified for lubricated fasteners.
Superior sends its torque wrenches for calibration every twelve months and their serial numbers are recorded in the engine’s assembly log. Our technicians used a click-type wrench and unloaded its torque setting spring as soon as they were done with a particular task to help maintain the calibration specs.
The camshaft of our Superior XP-400 engine with roller lifters had computer-optimized lobes that result in cams with a rounder profile than those designed for standard lifters. Abel placed the camshaft in each of the case halves, tested for smoothness and fit, and measured and recorded the clearances. After coating it with engine assembly lubricant, he set the cam aside. The XP-400 has a counter-weighted crank, so the counterweights were installed next.
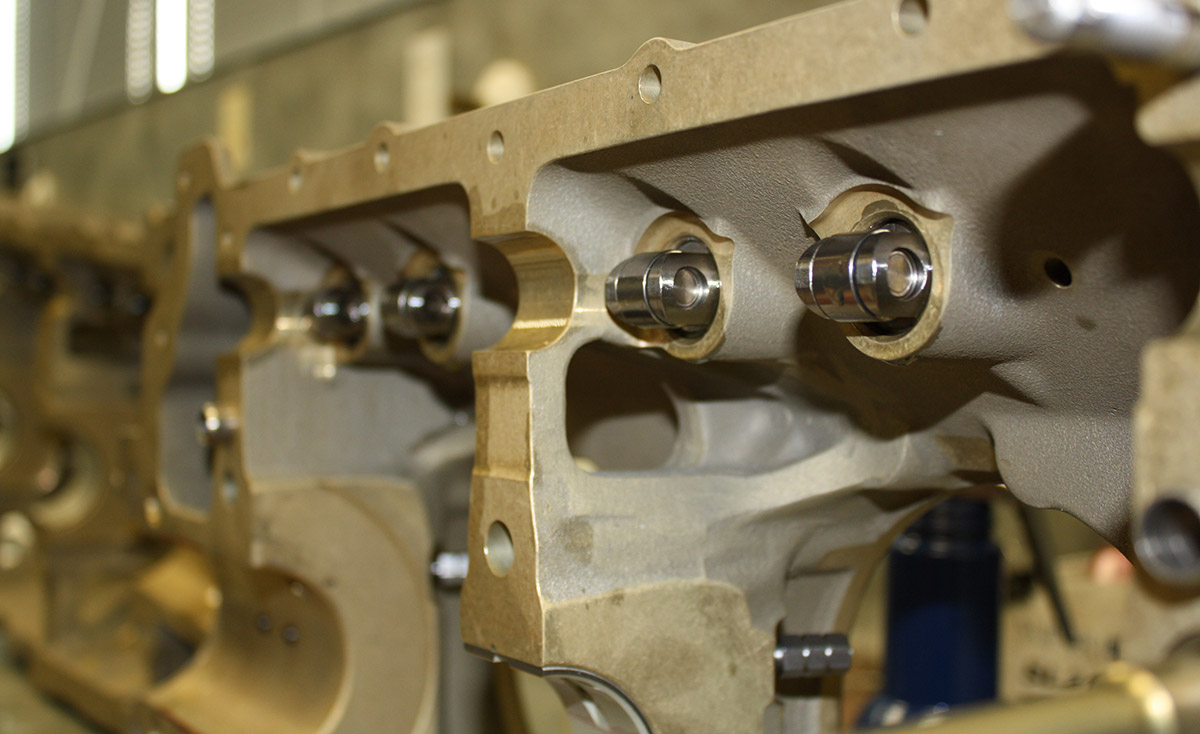
Superior’s XP-series crankcases are designed with reinforced cylinder decks, thrust-face lubrication, and balanced oil flow. They also accept cylinder-cooling nozzles. Abel showed us these features on the case and then turned his attention to the oil fittings that he installed with gasket sealant on the threads. He checked Superior’s signature roller-lifters for fit and finish, making sure they fit snugly into the bored holes in the case. As with all parts, they were pre-lubed, then slid into place, and secured with setscrews, which allow up and down movement but prevent turning within the borehole. Superior’s roller lifters are designed to be removable without splitting the case.
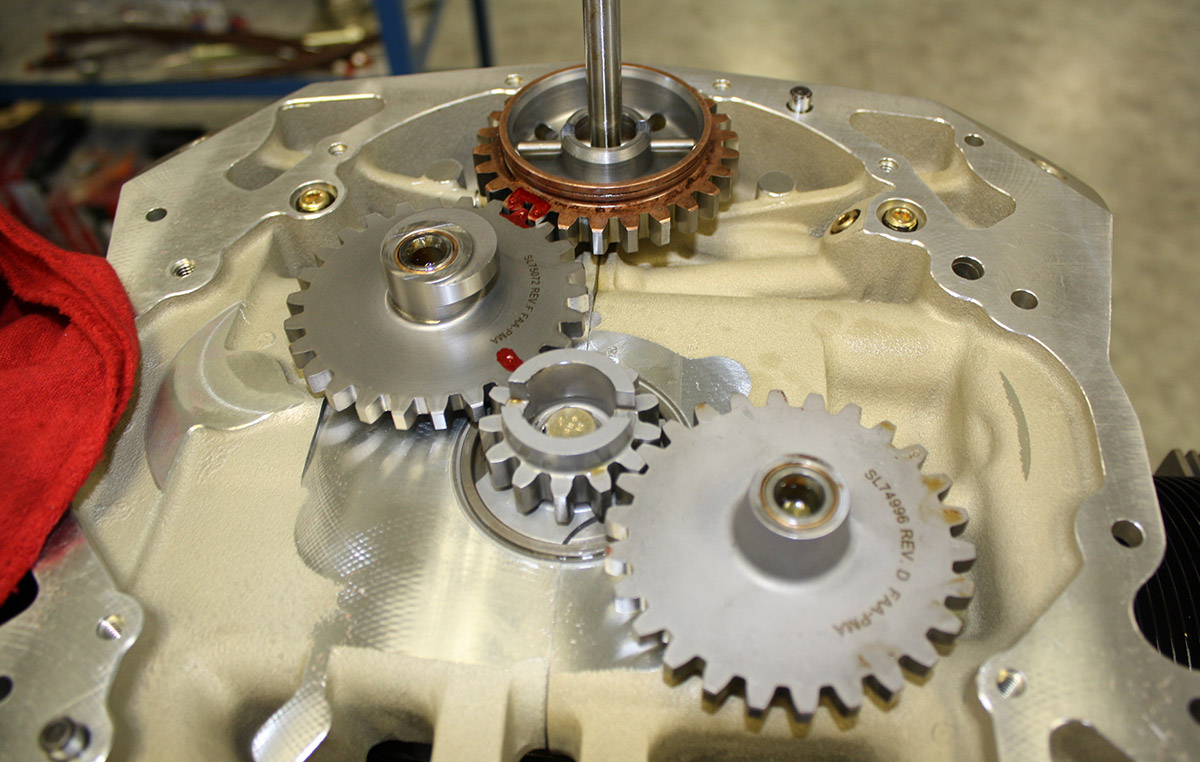
Drive gears for the front-mounted governor go into the left case half and the gear lash and clearances are checked and recorded.
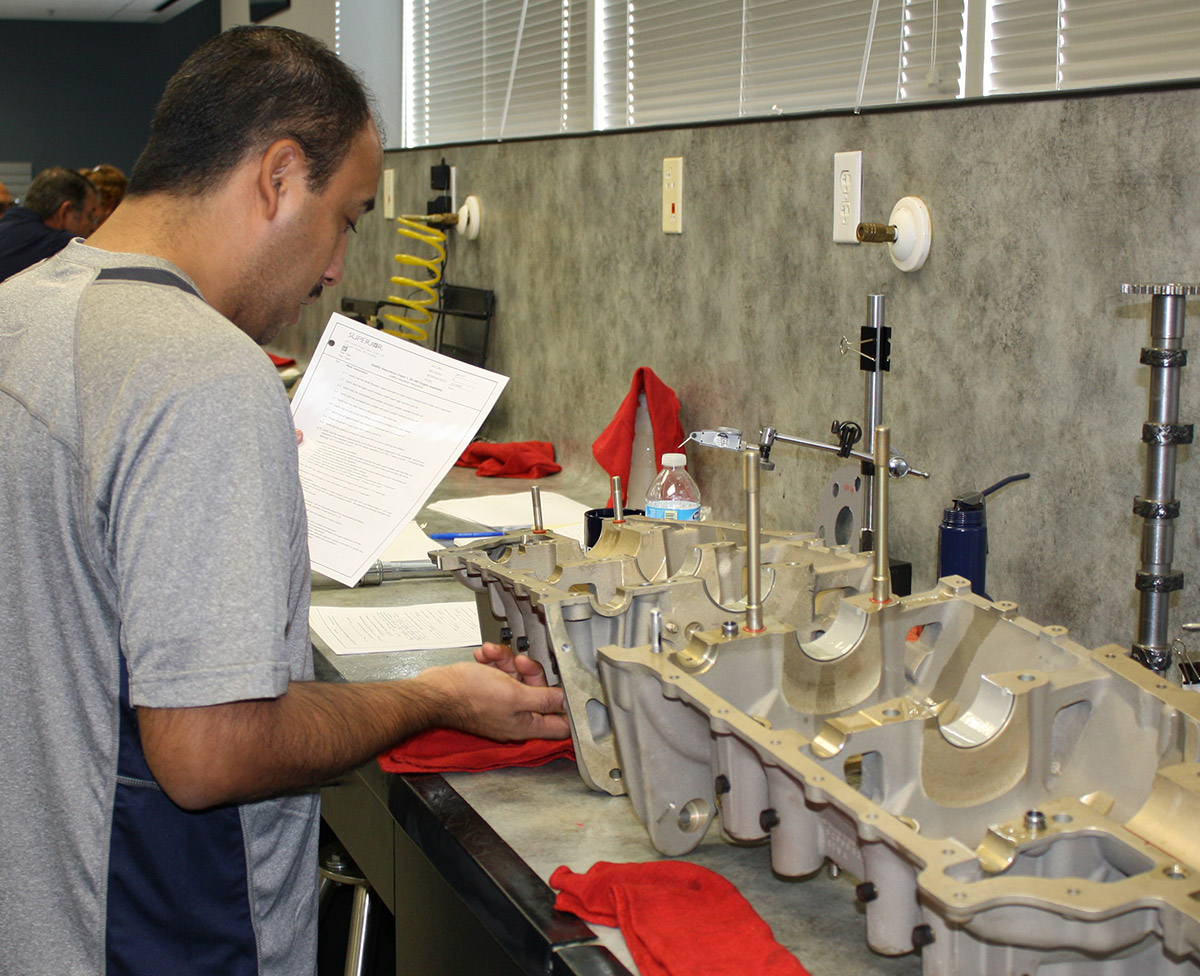
Quality assurance
The first of four quality assurance checks happens at this point because the next step, case assembly, makes internals inaccessible.
The engine builders step back and two QA employees follow a checklist to ensure all parts are installed properly with torques as specified and clearances within specified tolerances. Seeing this operation was a confidence booster for us—after the engine builder checked everything during and after installation, it was checked again by another person. Measurements were recorded in the QA log for the engine.
(Crank) case closed
With all the hi-tech sealants and materials available, engine builders still find that a simple silk thread works best for sealing the mating surfaces of the two crankcase halves.
Because of the aircraft engine design where the crank and camshaft rotate between the two case halves, using a soft gasket that could vary the distance between case halves is not possible (unless an O-ring is used— LyCon can machine cases to install a rubber O-ring, see KITPLANES February 2008, “Case Closed”). Engineers rely on a very tight fit where the two sides join. Enter the thread, which has to be grade D silk 00 gauge. The builder next cleans the machined mating surfaces of each case half with acetone and then coats them with very sticky Loctite 515 Flange Seal that will hold the thread in place.

He then carefully places the thread along approximately the middle of the mating surface, around the through-bolt holes, and extending to hang about a ¼-inch beyond the ends.
One more step before closure… After applying a liberal coating of thick grease-like lubricant, like Lubriplate, with a brush to facilitate keeping the crank bearings in place on the vertically position main journals, the builder puts the main bearings in place on the crank.
Now comes the part where a helper is valuable. One half of the case mates with the crankshaft on the engine stand. The connecting rods are pulled through the cylinder holes in the case and a one-foot plastic dowel is inserted through the piston pin hole. The half-case is then cocked slightly to wedge the dowel against the outside of the case pulling the crank and the case half together.
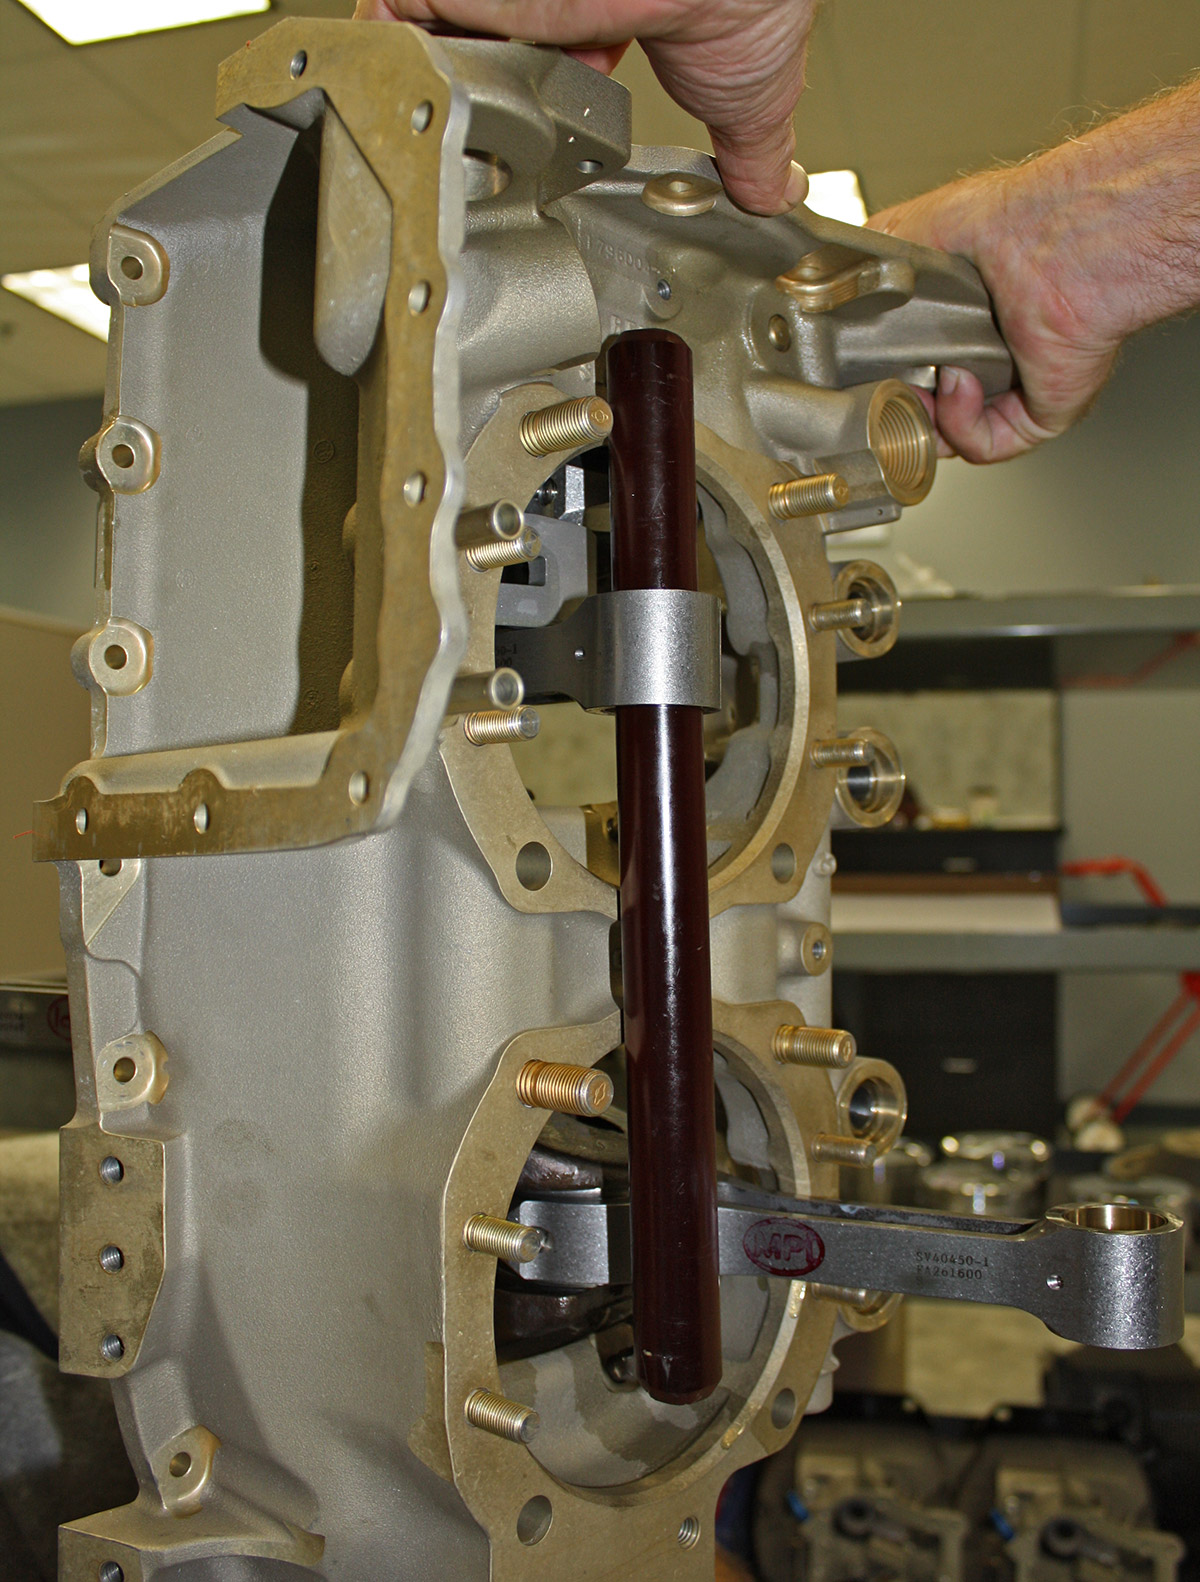
While the helper holds the pressure on the rod, the technician puts the camshaft in its place, which will stay there on its own—the helper just puts his finger on it for insurance.
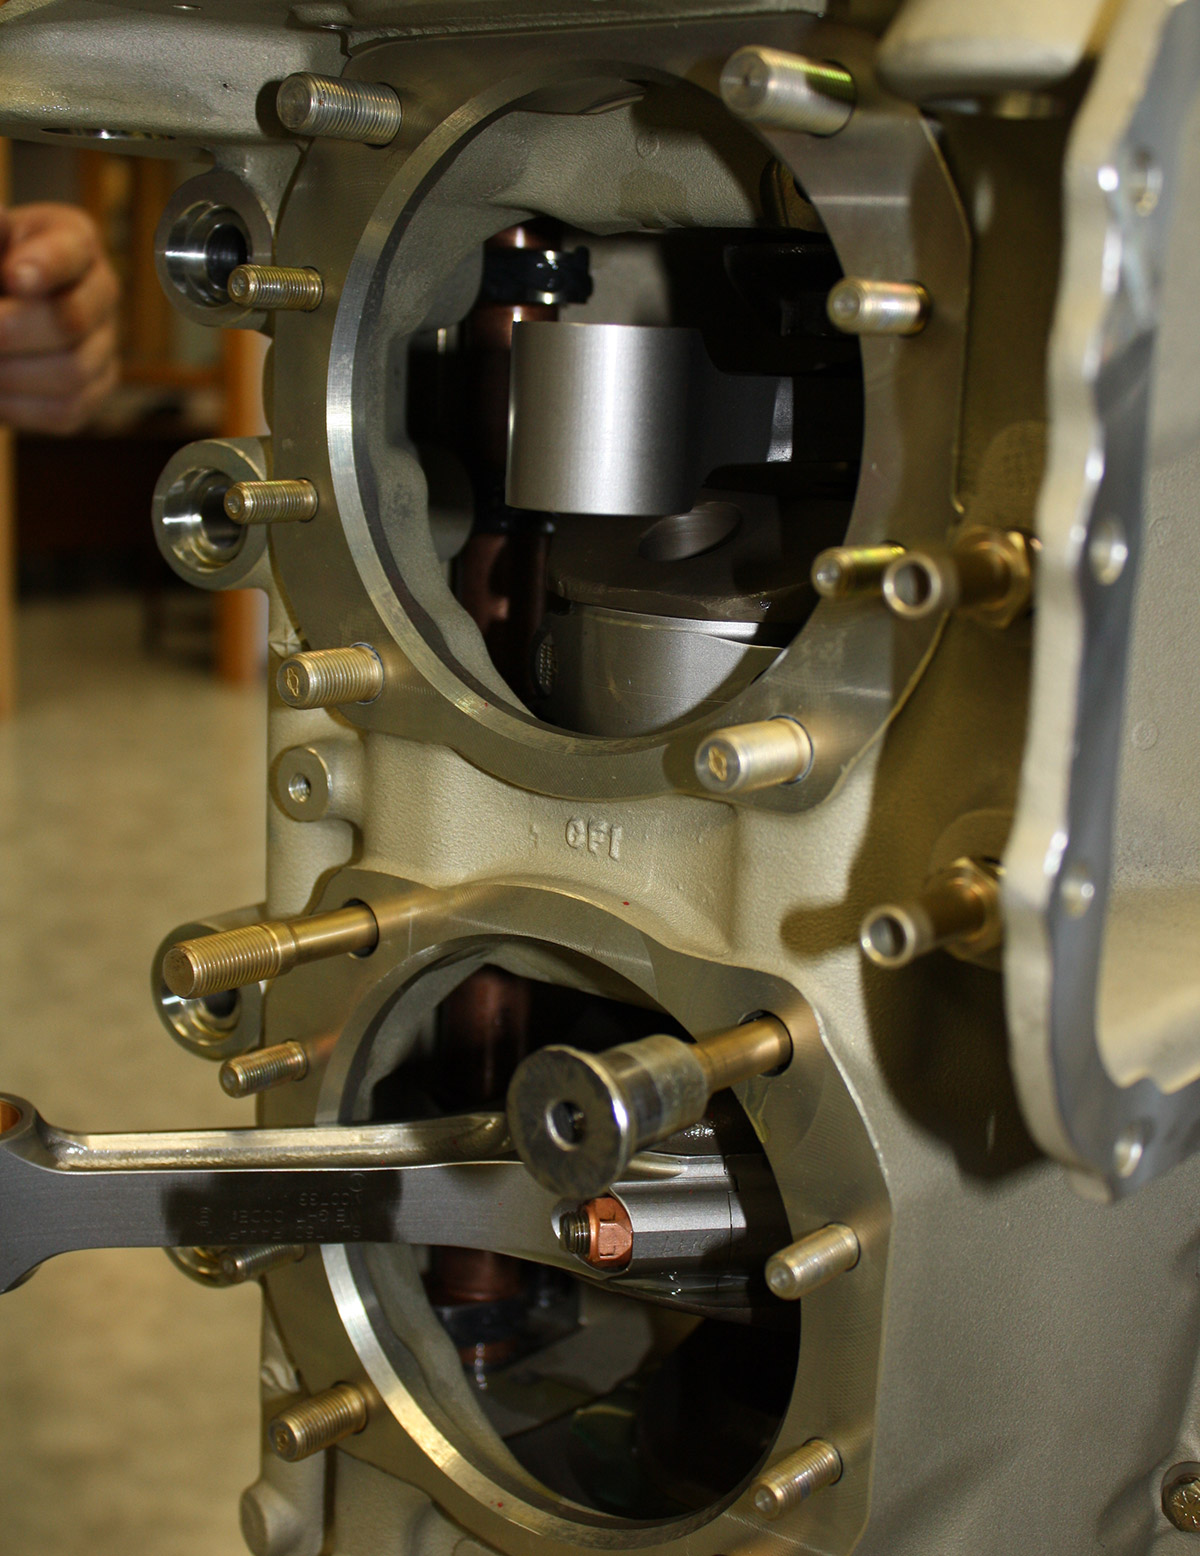
The left half of the case is then brought to the stand and carefully mated to the right half. When the two case halves almost touch, bolts along the top and bottom of the case draw it closed. The case throughbolts are then hammered in so that they protrude equally on both sides of the case.
Hammering the bolts directly would damage them, so a spare prop bushing is used as the hammering surface.
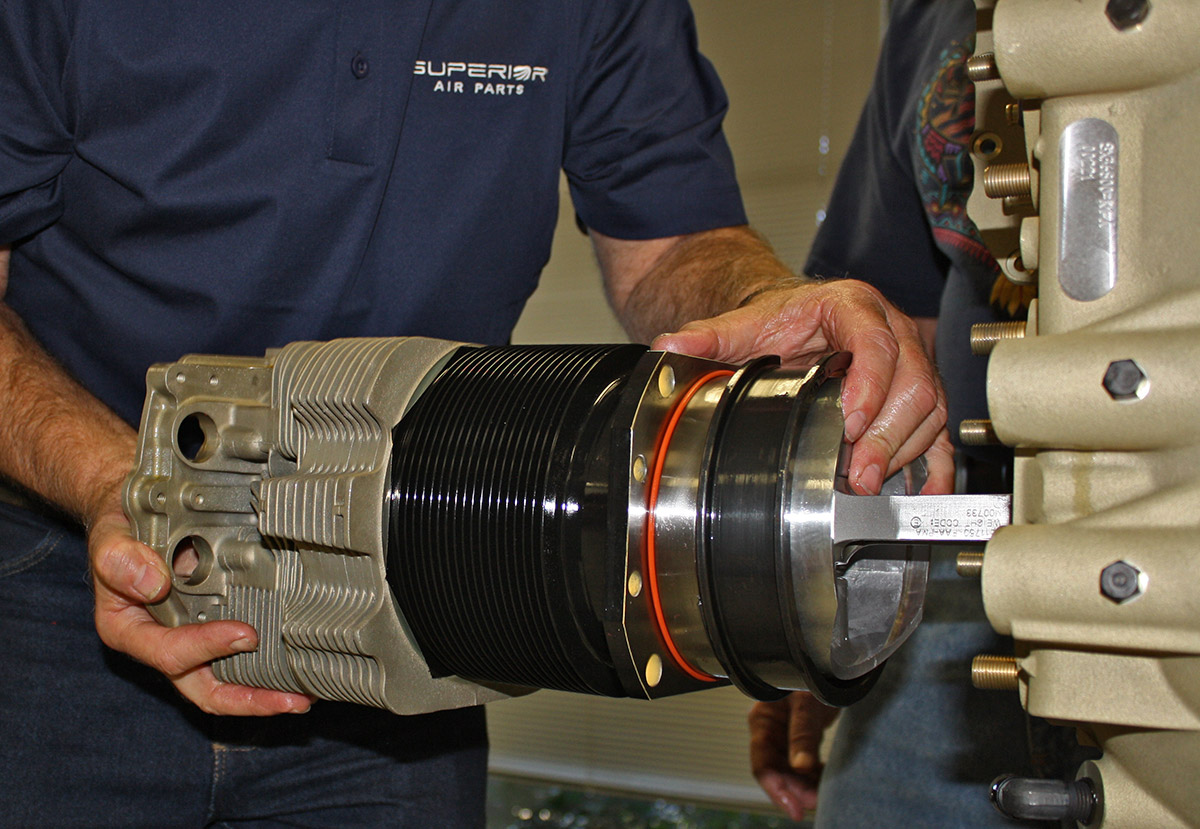
Cylinders—the top end
The angle-valve cylinders for the Superior IO-400 comprise an interesting amalgam of Lycoming heads and Continental barrels.
Continental’s barrel size is 5.250” for the 400 while a standard Lycoming has a 5.125” barrel. This combination gives the engine the needed dimension for the 215 horsepower it can produce with high-compression pistons.
Rick’s engine was an IO-360 with standard parallel-valve Millennium cylinders built with through-hardened AMS 6382 steel
barrels choked from 10 to 13 thousands of an inch. The company claims they provide a 6% increase in volumetric efficiency over conventional cylinders. Superior’s O-360 Millennium cylinder is also an FAA approved part that can be used on certified engines.

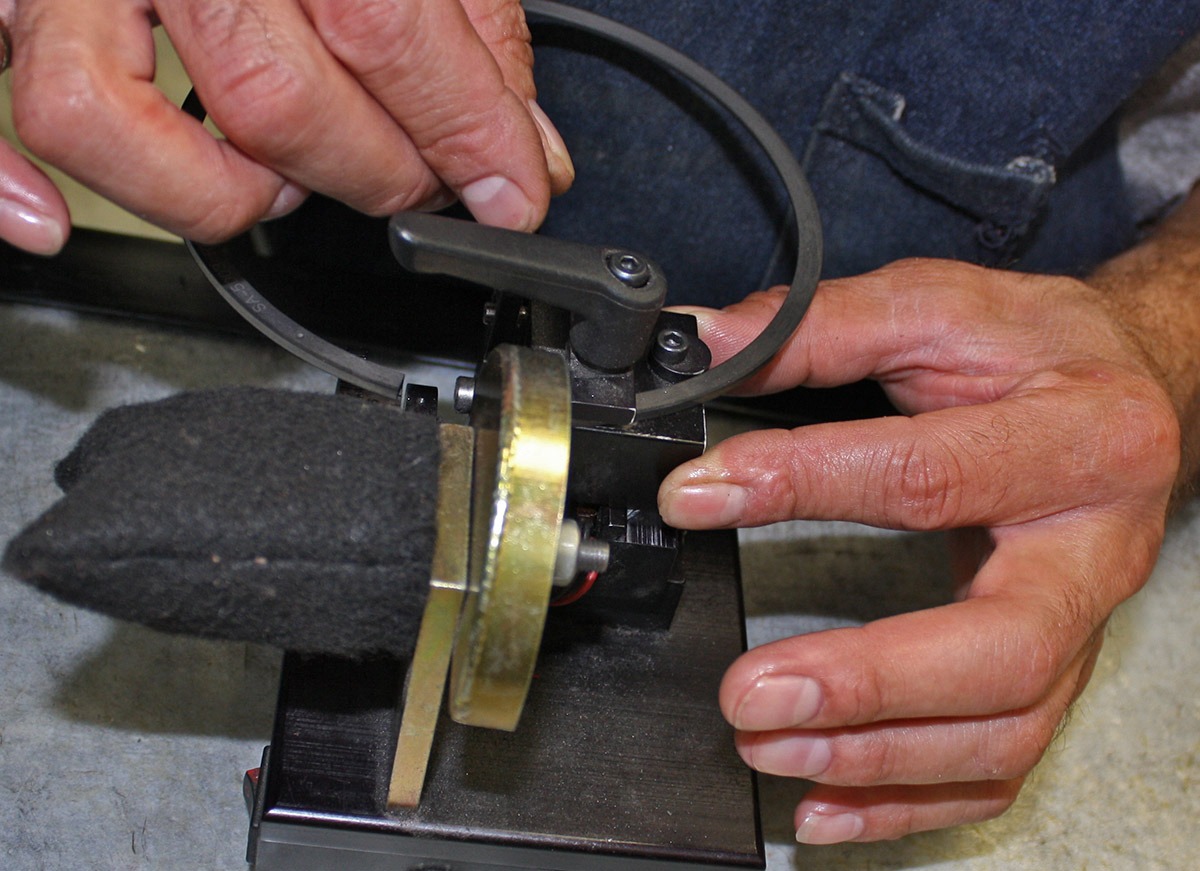
Superior cylinders are pre-assembled for the build school—the valves and seats have been installed and tested for leaks by the QA department. However, the builder needs to gap the rings. It sounds simple, but it’s a time-consuming process. There are 3 rings per piston (two compression and one oilcontrol ring). Because of the barrel’s choke, the assembler checks the gap at multiple locations inside the barrel with feeler gauges.
Rings that are too big (gap too small) are ground on a piston ring file through a trial-and-error process. The builder must take care to ensure that rings and pistons remain as matched sets after gapping.
After installing gapped rings on the pistons, a piston ring compressor slips over the rings and pushes them into place. A piston pin attaches the piston to the connecting rod.
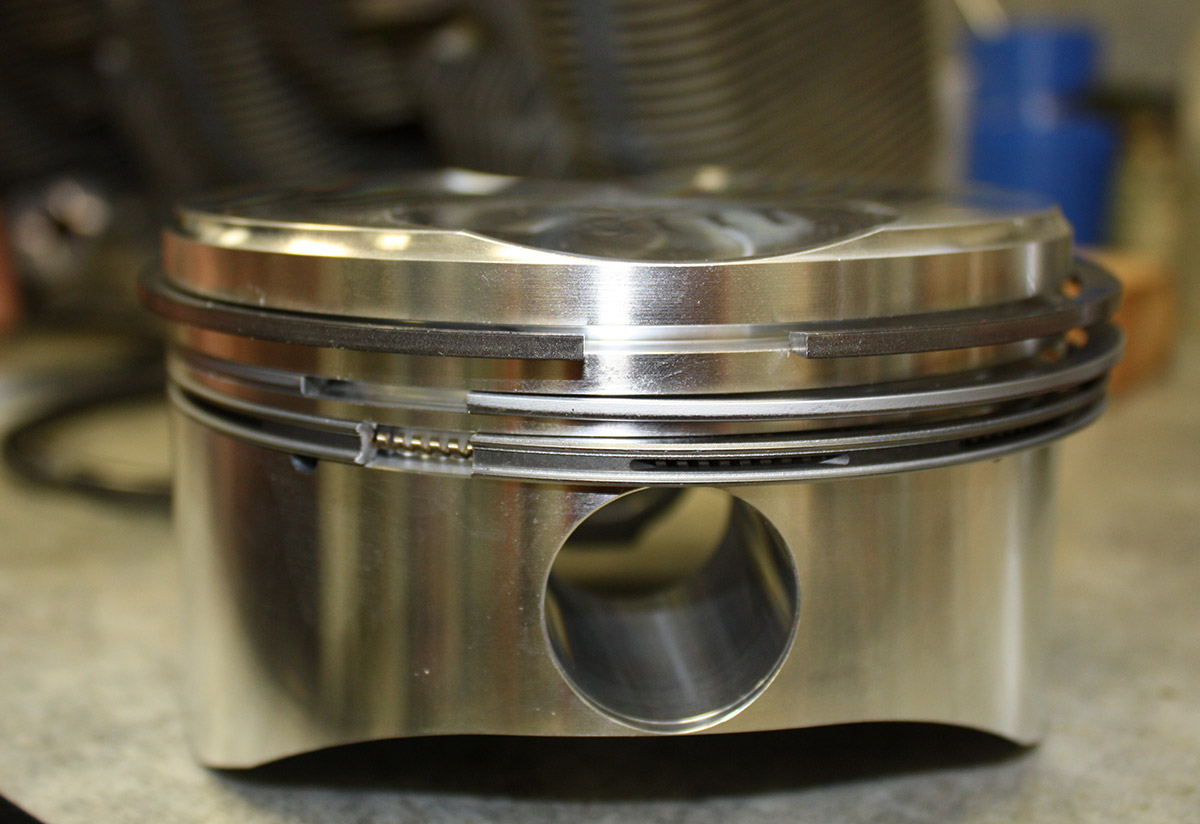
Then, the cylinder assembly slides over the piston and pushes the ring compressor off of the piston as the piston goes deeper into the cylinder. It takes an experienced hand to get this right the first time because the rings tend to pop out of their grooves. Abel prefers to use the soft plastic handle of an old toothbrush on the IO-400 engine to push the rings into the cylinder one by one instead of using a ring compressor.
Button up and call QA #2
Just a couple more steps remain to close up the case—torquing the nuts to specification at the cylinder base with the help of a cylinder base wrench, adjusting the case through-bolts so that they protrude equally if the earlier hammering left them slightly off, and, finally, securing with safety wire any nuts on case bolts that will remain inside after installation of the accessory housing and sump. The accessory gears are next on the agenda. The crank and the camshaft are aligned using the timing marks on the gears and the tachometer drive is installed.
Then it’s time for the builder to take a break while the QA team does its thing and confirms everything is where it needs to be and torques and clearances are within tolerance. The quality check marked the final step on day 2 of our Engine Build School.
Final day—all the details
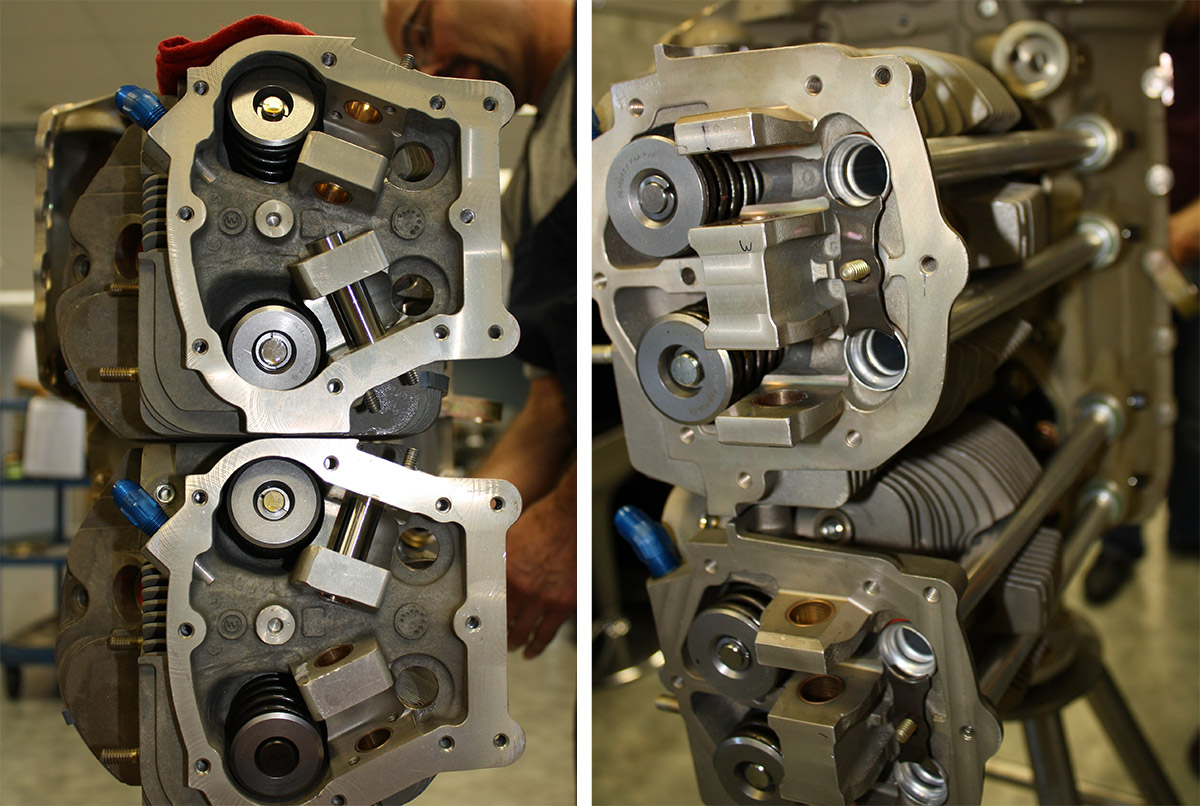
The next morning, Abel busily installed the pushrod tubes and pushrods. Rick and Darrell had it easier on the IO-360 engine because of the simpler tube assembly. The IO-400 uses spring steel clips rotated into position to hold the tubes and requires nimble fingers to get everything lined up without pinching a gasket ring.
Following installation of pushrods and rocker arms, the builder checks clearances with a go/no-go gauge. The parallel valve engine’s rocker arm shafts can be put in place now. The angle-valve IO-400 cylinders had already been slipped into their guides when the cylinders were mounted to the case because the head’s geometry prevents later insertion—one of many potential lessons on the importance of understanding the necessary sequence of an engine build and how it varies from engine-to-engine.
Once the inter-cylinder baffles are clipped on and the oil pump installed on the accessory housing it’s time for the third QA check before adding the accessories.
The accessory housing goes on against a gasket smeared with layer of Dow Corning’s silicone compound and bolts are torqued.
Mounting the fuel pump, magnetos, oil filter adapter, and Vernatherm valve comes next.
Both engines were equipped with Slick magnetos, so the technicians attached them with a loose adjustment of about 25° TDC— mags will be properly aligned at the test cell but for now they are just left loose. We connected the cylinder heads to the case with oil drain tubes and added the rocker covers to dress up the engine and signal that we’re getting closer to the finish line.
The Superior’s cold induction sump, designed with tuned and ported intakes for improved airflow, constituted the last big part. Cast from a stabilized structural aluminum alloy, it has stainless-steel intake tubes. A SkyTec starter, Precision SilverHawk fuel servo, and the flow divider (a.k.a., spider) with its fuel nozzles were next hooked up.

Abel demonstrated his extensive experience by masterfully bending by hand the
stainless steel lines that connect the flow divider to the nozzles into elegant and efficient shapes then securing them with ADEL clamps to prevent material fatigue from vibration.
Finally, the builder screws in the oil fill tube, torques it with an offset open-end wrench, and hooks the ignition harnesses to the magnetos. The engine is now ready for the test cell following the last QA check in the build room. Two more QA checks will be performed after the engine leaves the test cell.
We didn’t get to witness the testing of any engines on the dyno, but I’m sure it is gratifying to watch the once pile of parts on a cart come to life as a beautiful new engine.
At the end of our engine building school, Superior’s CEO Tim Archer presented participants with certificates of completion.
Summing up the experience
It’s good to see the revival of an aviation company in today’s tough general aviation market, and especially one with a strong offering for the experimental aviation segment. I’m sure we will see more innovative products from Superior in the near future.
The Superior Engine Build School provides a valuable learning experience for anyone in aviation, but especially homebuilders. Don’t expect to become an expert after getting the certificate, but the knowledge gained here will undoubtedly improve your understanding of the engine, its moving parts, and, very importantly, the purpose behind the design. This knowledge will not only help you keep the engine healthy, but potentially help you understand and diagnose issues that may come up during the engine’s life in the airplane.
For more information, contact Superior Air Parts at 800-277-5168 or visit www.superiorairparts.com.
The Engines
Our class built two different four-cylinder engines: Rick built an XP-IO-360-B1AD (the most popular model), while I observed Abel Martinez build an XP-IO-400-B1AD2. Both engine options included a cold air sump, roller-lifters, Slick magnetos, Precision fuel injection, and a hollow crank for a constant-speed prop. They were set up with midcompression pistons.
Even though these engines are experimental, many parts are FAA-PMA approved. The XP-360, for example, can be built with 100% approved parts if the customer orders standard tappets. The roller-lifter technology is experimental.
Superior still has a small stock of O-360 cases made by Thielert, and that’s what was used on Rick’s engine, while the XP-400 case was supplied by Kurt Manufacturing in Minnesota. Both were works of art, but a notable difference was that Thielert alodined their cases first, and then machined them, while Kurt Mfg. completes all machining first and then applies the alodine treatment.
Superior’s crankcases are designed with pressurized oil flow to thrust faces, provisions for cooling nozzles and reinforced web area between cylinders.

The company says they observed where Lycoming and other manufacturers were having problems with the engine design and avoided those issues in the XP-series. Their Millennium cylinders have a good reputation and the company understandably takes pride.
According to Superior, the Millennium cylinders in XP-360 engines consistently produce 178 to 183-hp on the dyno.
The engine warranty covers 24 months after the first operation (within 12 months of delivery) or 1000 hours of operation, whichever occurs first.
Engine and class options
Superior’s Engine Build class is available for customers buying any of the XP engines. The company offers engines assembled and test run by Superior technicians, but for $1000, a customer can attend the School and watch the build of their engine or build the engine under Superior’s tutelage. Third party engine shops can also buy the Superior kits and assemble the engine for you or, potentially, allow you to assemble the engine yourself.
The assembly process requires some specialized tools and instruments not normally found in the average homebuilder’s toolbox and the cost of purchasing these seldom-used tools to build an engine in your home shop might go a long way towards the build school tuition.
The know-how and confidence inspired in build school graduates provides a pretty compelling reason to consider the build school route for anyone without extensive engine experience.
About Superior
The company debuted in 1967 as a manufacturer of valve replacement guides and grew to a major supplier of engine parts, including cylinder assemblies and –in 2001–complete engines. Superior’s cylinder sales put a serious crimp in its competitors’ cylinder overhaul market. The price of a new Superior cylinder was about $900 compared to $600 for an overhaul, so many plane owners opted to buy new.
Thielert, an aircraft engine company from Germany, brought some good and some bad when they purchased Superior Air Parts in 2006. Thielert was known for its Centurion Diesel/Jet-A engine and for making quality engine parts.
Unfortunately, Thielert’s financial problems in 2008 forced it into bankruptcy, which dragged Superior Air Parts down with it. In 2009, Chinese investors purchased Superior and, with a fresh infusion of cash, the company dramatically improved its business outlook. Superior recalled some employees who had been laid off in 2008.
I visited the Superior facility at its peak in 2007 and the difference between then and now is noticeable. There are fewer employees in the cubicles and halls now, but according to Customer Service Manager Brent Henman, the company is on track to achieve its pre-bankruptcy and pre-recession sales numbers. He admitted that many people he met at aviation events told him they didn’t realize Superior was still in business, so the company has some room for improvement in its marketing efforts.
The majority of Superior’s business today comes from supplying parts. Sales of completed engines are comparatively small, although it’s likely that ratio will change once the company ramps up its efforts with the build school and more homebuilders realize Superior engines provide a competitive option.
A new management team with CEO Tim Archer at the helm has placed their focus and investment on growing the engine building business. Keith Chatten, VP of Engineering & Quality, noted that their ratio of engineers to other employees is high compared to other engine-producing companies.