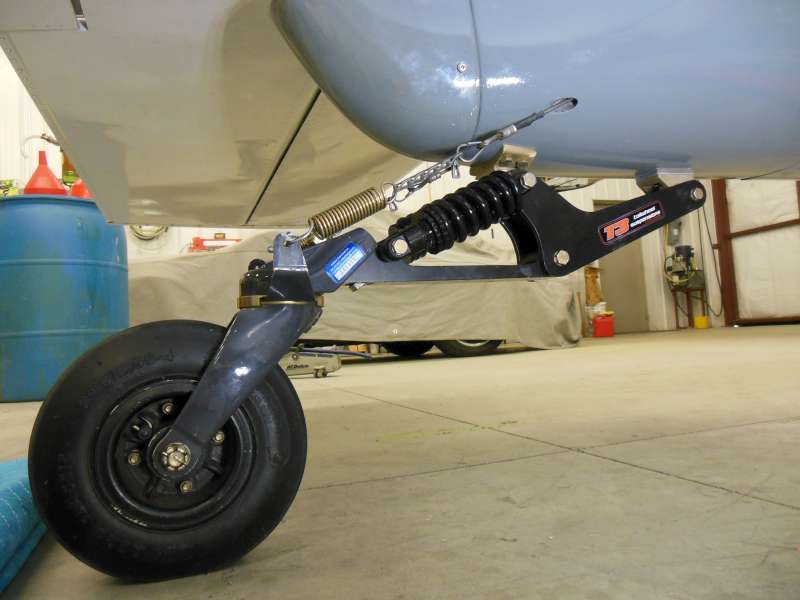
It would be an understatement to say that the T3 tailwheel suspension system is proving itself to be a dramatic improvement over the factory leaf-spring. The original setup has often been prone to shimmy and other problems and provides minimal suspension value, especially on rougher fields. Several of us have replaced the springs with the new T3 suspension and the results are dramatic.
This article is intended to provide some information about options for mounting the new setup and some thoughts about the process. By the way, references to Dan mean Dan Dufault, who is the designer/supplier of the T3 tailwheel. Please note that while I have a lot of positive feedback to report on this mod, I do not work for Supercubs North or T3 or Dan Dufault, and I have no stake in this other than to give the rest of you info on my experience.
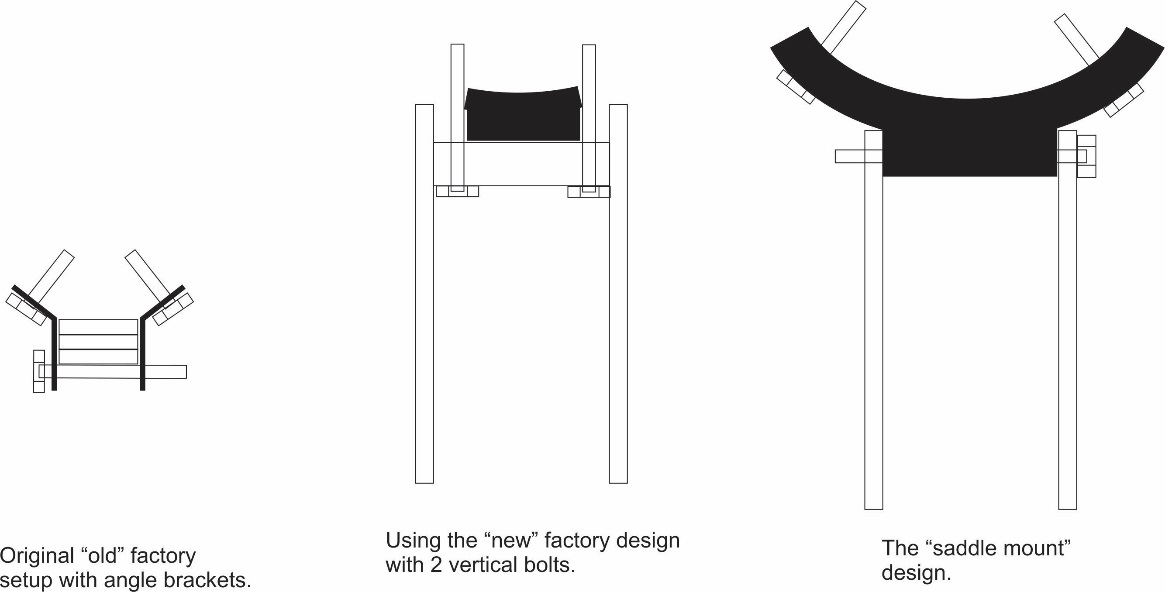
The original tailwheel mounting on the GlaStars and most Sportsman used two brackets to contain and support the springs. Later the factory came up with the “new” 2-bolt attachment, which does seem to be an improvement over the original attachment. The T3 suspension can be installed using either of these earlier arrangements. However, there is a third option that uses a “saddle” bracket that provides what appear to be a stronger more stable mounting, and is very straightforward to install. In every case, you should be able to use your original tailwheel (probably Alaska Bushwheel?) and it should mount up to the T3 suspension without modification to the suspension, tailwheel, or steering cables.
Whichever setup you plan to use, it affects only the aft mounting point. The forward mount uses the same bracket and bolt as either factory setup. Each of the three different aft mounting setups will include a lateral bolt that passes through the T3 suspension frame.
If you have the old two-bracket system or the two-bolt system, and you choose to keep your setup, you will need to get with Dan to order the correct configuration and make sure the dimensions are correct for your airplane. In my case, I had the old brackets and wanted to get rid of them in any case. I was planning to install the two-bolt setup until Dan sent me pics of the “saddle mount.” I think I might have been the first one to try it, and we’ve done a little tweaking on it, but I am really happy with the decision. Most of the information below will focus on that setup.

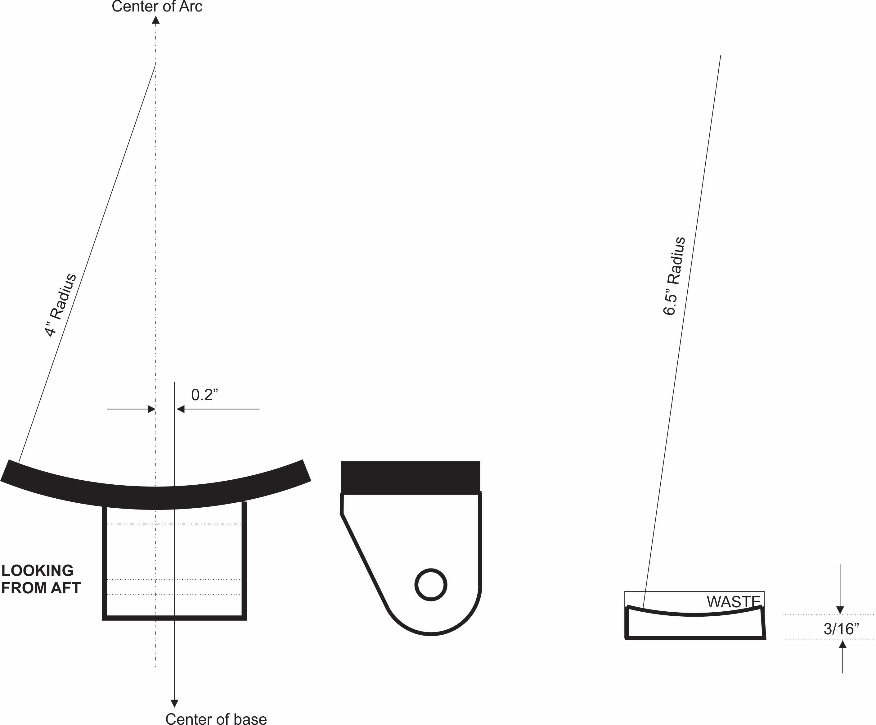
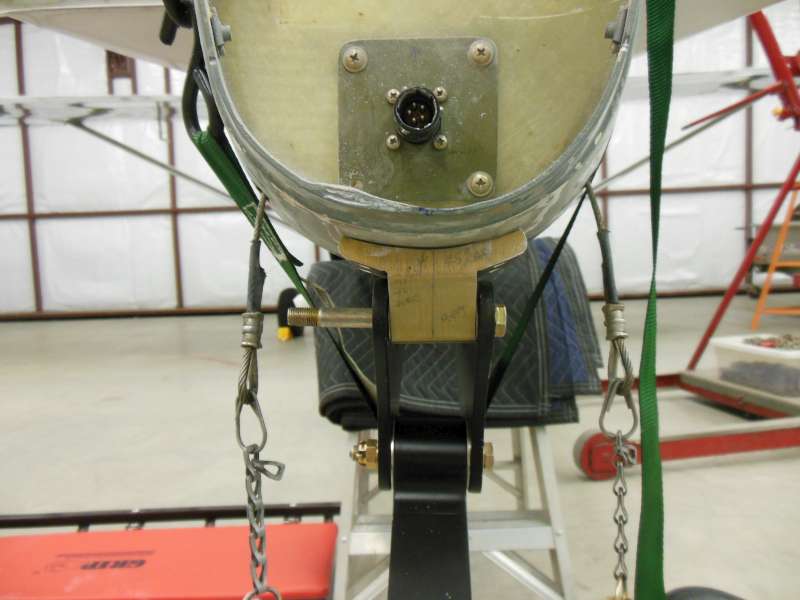
The mount attaches to the fuselage via 4 AN4 bolts through the “wings” of the saddle. If you are going to convert from one of the other mount setups, just fill the old holes and drill the new ones. When I got mine, the holes in the wings were not drilled, but I think the new ones may be pre-drilled. Also, the curvature in the saddle on mine required a great deal of sanding to get it to mate with the fuselage, to center the tailwheel with the exact center of the airplane, and to ensure that the tailwheel suspension is perfectly vertical. Once again, I think future production pieces will be much better fitted and require far less adjustment on the spindle sander.
If you have read the factory’s instructions for installing their new 2-bolt mount, you know that the center of BHD-E is actually 0.2” left of the true center of the airplane, and you need to be sure to install the mount off to the right (as measured to the centerline of BHD-E) by that amount. To that end, when I reshaped my saddle, I made sure the T3 block (and therefore the T3 suspension) would be perfectly centered on the fuselage and that the sides of the T3 suspension are perfectly vertical. Note the alignment marks on the bracket and fuselage (and use of cargo strap to hold tailwheel suspension against fuselage while measuring, drilling, etc.)
As for the orientation of the forward and aft brackets, you have a lot of latitude there. The forward mount is slotted so that it can slide fore and aft to mate with existing 2-bracket or 2-bolt mounts. If you are installing the saddle mount, the best way is probably to have the slanted face of the fore and aft mounts facing forward, but you can do it either way. (Mine are the other way.) Also, you can center the forward mount in its slot before you drill the saddle mount holes through the fuselage.
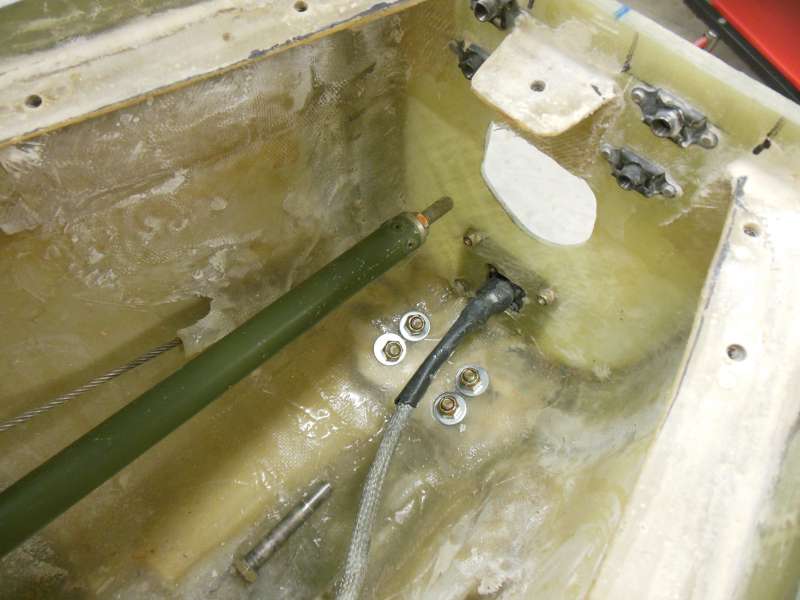
If you remove your original brackets or 2-bolt mount and install the saddle mount, you may want to add a little strength to the fuselage by laying in a few layers of suitable glass. The saddle mount provides the most surface area for mounting, and with a little extra glass, looks like it may be stronger than either of the other two approaches. In the next photo you can see the extra glass and the four mounting bolts holding the saddle.