As we get more Sportsman builders who may not have extensive tool collections, the question has come up, what tools do I really need to maintain my airplane? To answer that question I have put together a list of tools needed to perform routine maintenance up to and including your annual condition inspection. Major engine, prop, or avionics work will require additional tools and expertise. Let’s look at these tools by task, and then I’ll summarize at the end.
Oil Change
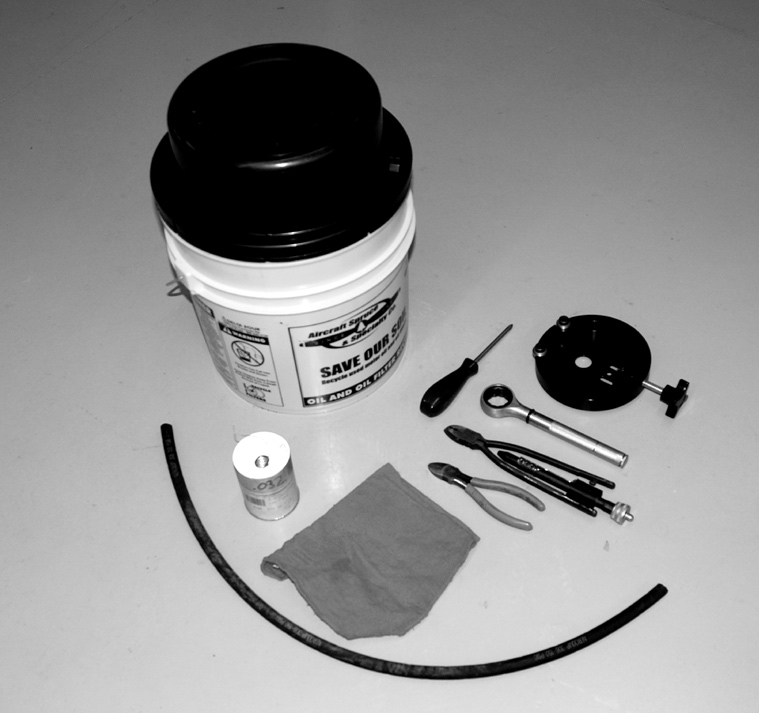
The oil change is the most basic maintenance operation. For that you need a screwdriver (probably a #2 Phillips) to remove the cowl. GlaStars and carbureted Sportsmen will then need some side cutting pliers to cut the safety wire that secures the carburetor heat valve pins. With the cowl removed you will then need a drain hose and a bucket for the oil. You should have a quick drain installed in your oil sump. If you do not you should get one right away. Installing one requires a large adjustable wrench (10-12”) and safety wire pliers. As the oil is draining the oil filter needs to come off, which requires side cutting pliers again and an oil filter wrench. If you don’t want to spring for the oil filter wrench you can use a large adjustable wrench or some water pump pliers (sometimes called channel lock pliers). A nice-to-have tool is an oil filter cutter, so you can open up the filter and check it for metal. Some people skip this step, but it is best to check the filter each time. Putting everything back together requires the same tools, plus safety wire pliers and .032 safety wire.
Ignition System
Ignition system servicing requires some more tools. Spark plug replacement is not too hard. For that you need an aviation spark plug socket, an extension, and a ratchet. You also need a medium sized adjustable wrench or a 3/4” open end wrench to remove the spark plug wire caps. A spark plug tray and a gap gage are very helpful as is a gapping tool. You can gap your plugs without the special tool, but it isn’t recommended. As a note some anti-seize and new plug washers should be used each time you remove and reinstall spark plugs. Also to properly reinstall spark plugs you need a torque wrench that will go up to at least 35 foot-pounds (420 inch-pounds) Ignition timing, which should be checked at least annually, requires a magneto timing light, a 1/2” wrench, a 1/2” socket, an extension and a ratchet. A 1/4” drive ratchet is best for these tight places. Get someone with some experience help you with this the first time. Timing magnetos can be a little tricky with impulse coupled mags. Those of you with other types of ignition systems may need additional tools for your particular system.

Other Things Under the Cowl
The balance of the items under the cowl can be covered with a medium sized straight-blade screwdriver to tighten baffling screws. The 1/2” socket and wrench we used on the mags can also be used to tighten the exhaust nuts. Some 3/8” wrenches and sockets are needed for throttle, prop, and mixture linkages and other sundry items. A 5/16” nut driver (looks like a screw driver) is nice for hose clamps, and that #2 Phillips screwdriver is handy for electrical items and the air box screws. If you ever wondered what an 11/16” wrench is for now you get to find out. It is the perfect size for -6 fuel lines. A large adjustable wrench or a 7/8” open end wrench is needed for the -8 oil lines. Lastly a 1/4” drive torque wrench is recommended for the proper tightening of nuts and bolts.
One item that is part of the annual inspection is a differential compression test (sometimes called a leak down test). This will require an air compressor and a differential compression tester. In addition you will need the previously mentioned spark plug socket. This is another thing to be sure and get some help with the first time you do it. Since it is only needed once a year, this is a nice tool to share or borrow if you can.
Moving forward to the propeller, you most likely need a 3/4” open end wrench and a 3/4” crow’s foot and ratchet to get to the prop bolts on constant-speed props. If you have a fixed-pitch prop you may also need a 3/4” socket and ratchet. Lycoming O-320 engines may need a different size for their smaller prop bolts. You will need a torque wrench that will go to at least 75 foot-pounds (not inch-pounds) if you ever have to remove the prop. Since this is so infrequently needed, it is nice to borrow one or share one with another builder if you can. You already have safety wire pliers and side cutters, but you will need .041 safety wire for your prop bolts. For Hartzell constant-speed props you need a grease gun to lube the prop every 100 hours or once a year. Lastly a file to dress out nicks in the propeller blades is good idea.
Engine removal will require some 5/8” wrenches and an engine hoist. Cylinder removal and re-installation will require a Lycoming cylinder base nut wrench. Hopefully neither of these will be necessary for your plane.
Wheels and Tires
Wheel and tire maintenance is next. If you have a GlaStar you will learn about tire maintenance quickly. Sportsman builders will not have to deal with worn out tires for at least two years in most cases. But wheel removal is an annual inspection item, even if your tires are fine. That trusty #2 Phillips removes wheel pants. Next a 7/16” socket and ratchet will take the brake calipers apart. Unless you are not running wheel pants on the mains you only need some pliers to remove the axle nut cotter pin and a bar to remove the nut. If you have axle nuts without the mount for wheel pants you will need a large open end or adjustable wrench to remove the axle nut. I just bought a cheap one a Harbor Freight and cut it off short for convenience. Once the wheel is off the axle you need the 7/16 wrenches again to split the wheel apart, but before you do that you will need a valve stem removal tool to let all the air out of the tire.
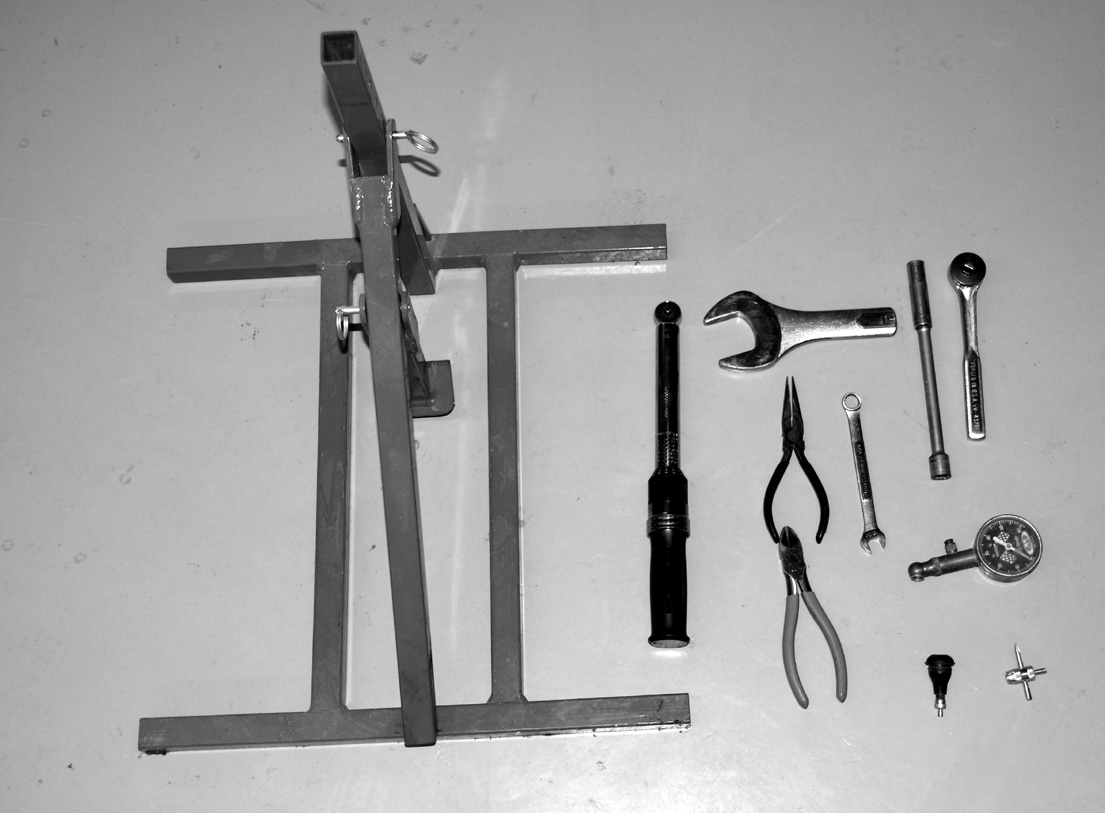
Once the wheel is apart you will need to remove the tire. To do this you first need to break the tire bead loose from the wheel. You can spend $150 on a bead breaker – nice but expensive, or you can try to do it with a hammer and tire irons – bad idea, or you can make a bead breaker tool out of a piece of plywood and just use your feet to break the bead loose. To make the tool cut a piece of 5/8 or 3/4 inch plywood into a circle about 18 inches across. In the center of that cut a round hole that is just a bit bigger than the outer diameter of your wheel. Place the “tool” on top of the tire and use your weight to work the tire bead loose.
Obviously to put things back together you need an air compressor and a tire gage. It is also a good idea to use a torque wrench to tighten up the wheel half bolts and brake caliper bolts. To replace the brake pads you need some other special tools. You can buy these if you like, but for most people these are definitely “borrow or share tools” since you will only use them once every three or four years.
Electrical
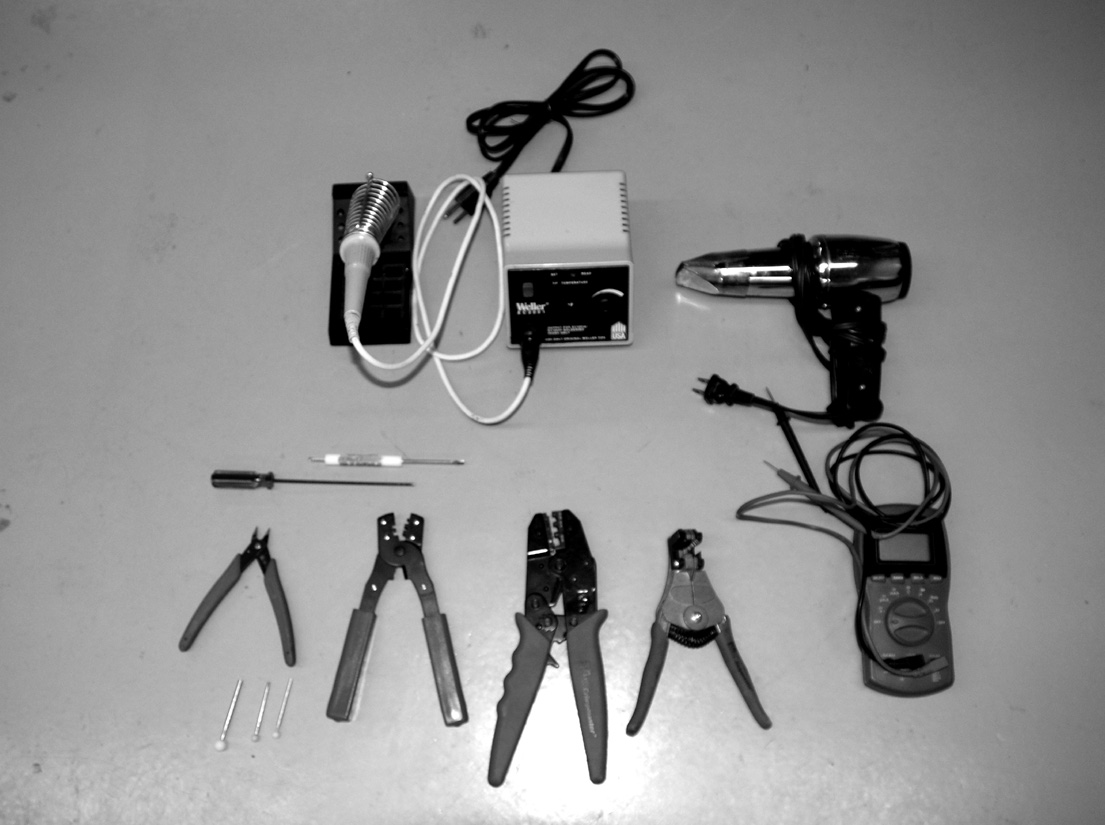
At least in theory electrical components do not need maintenance, but minor repairs are inevitable. Wires chafe, terminals work loose, stuff happens. Most people are either electrically inclined and already have some tools for this purpose or are not willing to tackle electrical problems more complicated than replacing a burnt out landing light. If you want to give it a try you do need a few things. A good multimeter is a must. So are decent crimpers for the various connectors to be found in airplanes. You will need to go online or to a good electronics store to get these. Ask someone who works with electronics to help you get the right stuff. A 3/32” Allen wrench is a must for removing radios, even if you don’t want to work on them yourself, and Molex connector pin tools are very handy for repairing those pesky but common Molex connectors. A good soldering iron with an adjustable temperature control is nice to have, but there are not very many things on an airplane that are soldered. A good soldering iron is not cheap, so this is a good one to borrow or get help with for the few times you will need it. In addition you need some good, small side cutters for those tiny wires and some wire strippers. Lastly a heat gun is nice for dealing with the shrink tubing that goes around many wire connections.
And More
If you are a tool addict there is really no reason to hold back on any of this stuff, but of course, if you are a tool addict you already know that. What you will find if you simply buy every tool you will ever need is that you will always have other people wanting to borrow your tools. This is fine as long as you have some way to keep track of who has what, but it can get out of hand. The other risk is that they will not only want to borrow your tools, but they will also want you to help them do the work. Again, this is OK if it doesn’t get out of control, but caution is definitely advised. I for one enjoy having the tools and helping other people work on their planes, but I also enjoy flying, so a balance must be maintained. At the very least make sure you get them to buy lunch.


