GlaStar Strake Installation Tip

0
GlaStar strake in position. Photo: Zach Chase, Fibertech Composites

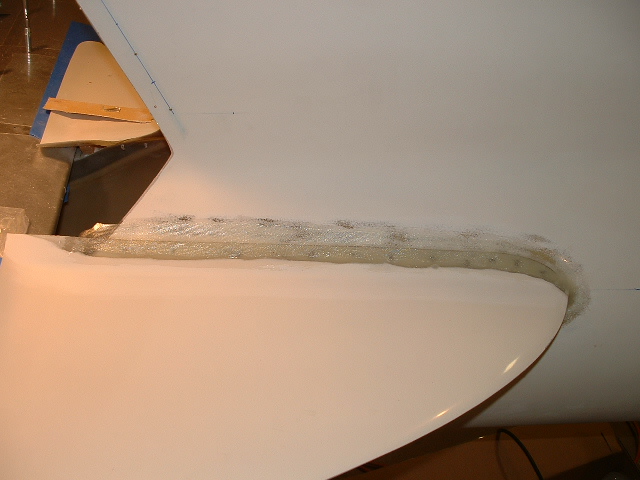
I tooled these myself off of Jim Londo’s GlaStar but the incidence was later changed. It is a real struggle to get these to fit the fuselage contour well. On the pair i just installed tonight, I cut off the lower (underside) flange and they swung right into place next to the fuselage.The upper flange can be left intact and clecos used to hold the strake to the fuselage while a Q-cell radius is applied and cured on the lower side. Don’t cut too much of the lower flange off. On this installation, I cut the flange off at the tangent to the radius and then sanded further to fit. (All the sanding was required on the aft end and the radius was all but gone there.) Two plies of 7781 on the 45 should finish the job on the lower side! I also found that a digital smart level worked great to set the incidence (1.5° down) the same as the stabilizer, and they came out the same from side to side.

Advertisement
Previous articleGlaStar Cabin Air Inlet Position Tip
Next articleGlaStar Top Deck Installation Tips
Ted Setzer
Born Wichita Kansas Oct 02, 1953. (have a fascination with tornadoes) Private pilot SEL & Sea approx 3,000 hrs Co-founder of Stoddard-Hamilton Aircraft in 1979. Contributed developmentally toward all models of the Glasair, GlaStar and Sportsman in from 79' thru Oct. 2016 when I retired. Whew...38 years! Started construction of my own custom, lightweight Sportsman in 1999 from the basic kit. First flight of N11YM was Jan 2013. I love this plane and have tested three variations of taildragger main landing gear. Recently purchased a set of Clamar amphibious floats and can't wait to install them hopefully in 2018.