Extra inspection hole: I installed an extra inspection hole, located at the connection of aux tank to fuel line. I obtained the parts (doubler and inspection cover) from SHAI after talking to builder support to make sure it was OK. In addition, I installed a section of the blue fuel hose (same stuff as used in wing root) inline between the aux tank and the transfer pump. This was in order to be able to remove and replace the pump if ever necessary. The instructions for installing the aux tank sump drain are in Service Bulletin 36a (I think the # is correct).
–Glenn Culver
Aux fuel tank pump mounting: You might want to reconsider where SH wants you to mount the aux tank fuel pump. This pump is somewhat weighty and I did not feel comfortable with this heavy pump mounted on a doubler on the lower skin. May I suggest as I did, mounting >the pumps on the wing spar attach trusses. You make a small U shape bracket with feet and loop the bracket thru the truss holes and bolt on. I had a pump failure so even at this location I was able to service/replace the pump thru the access panels.
–Dan Dudley
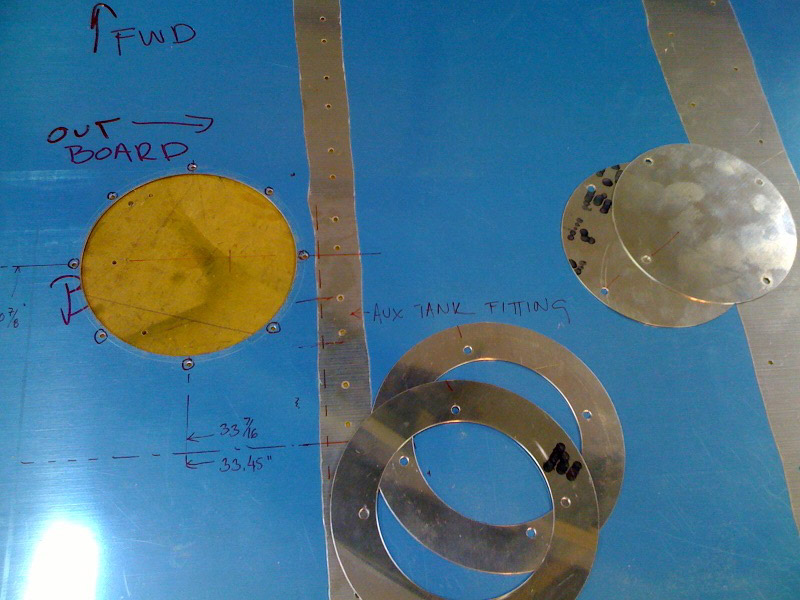
Plumbing for aux tanks: The line from the tank to the pump inlet is some 80+” and requires some bends to get under the strut beam and through the adjacent rib. The manual suggests leaving the tube swage connection at the pump open, and cinching up the one at the tank for installation after the top skins are riveted. This means threading that crooked long tube thru a path of obstacles, and then securing it with ties, etc afterward, all thru the inspection holes. I chose to secure the tube at the pump and along it’s route, and leave it unsecured at the tank. This means I will have to install an extra access hole at the tank outlet fitting, but that will make the final tie-in a proverbial piece of cake.
–Bill Wilson
Alternate installation of drain boss: In the same vein, the manual suggests finalizing the holes in the tank and the bottom skin for the sump drain after top skin riveting, and then installing the drain boss through the tank. Again, I found it very straight- forward to do these holes with the wing open, and the tank in and out to the bench and drill press. I used the boss/o’ring on a string technique to get the boss thru the tank from the fill hole to the drain, and it was no problem on the workbench in various positions. I left the string taped to the tank at both ends, and anticipate no extra effort in securing the boss at the final slide-in.
–Bill Wilson, #5278


