Whilst many have been at Oshkosh enjoying themselves, I have been doing likewise checking out my first wing in preparation for riveting on the top skin. One fault I had noted in running the cables was that in holding the flaps up tight to tighten the retraction cable, the flap doubler was rubbing on the flap track. I was in a bit of a hurry, with help on hand to hang the wings and run the cables- hence the poor check at this time.
On the bench this weekend, I was able to inspect this more closely and was disappointed to find that my flaps weren’t in fact fully retracting due to the flap doubler and skin hitting the back of the flap track bracket. This assumes that to be fully retracted, the FLAP ROLLERS should be against the forward end of the slots in which the roller track. Not only retracted, but fully extended the lower skin and doubler was interfering also.This interference was to the extent of at least a quarter of an inch. So much for neutralizing my ailerons, to the retracted flaps, to run their cables!
I started by checking the construction information in Vol I sec VII to check whether I had missed anything. The skins had been drawn tight round the nose ribs and my rivet lines on the main spar were within reason. The trailing edges did not meet exactly (1/16″ to 1/8″ difference) but nothing a file wouldn’t hide.
My problem turned out to stem from Steps 54 and 55 and I believe anyone still to build their flaps should take care.
The above steps instruct you to align the slots in the doublers with those in the skin. The problem is when these skin slots are too far forward as they were in my flaps – both top and bottom (suggesting that the cutout for them is not right). I had to remove over 1/4 of an inch on top and half that on the bottom to let the flaps lower and retract fully (rollers at the ends!)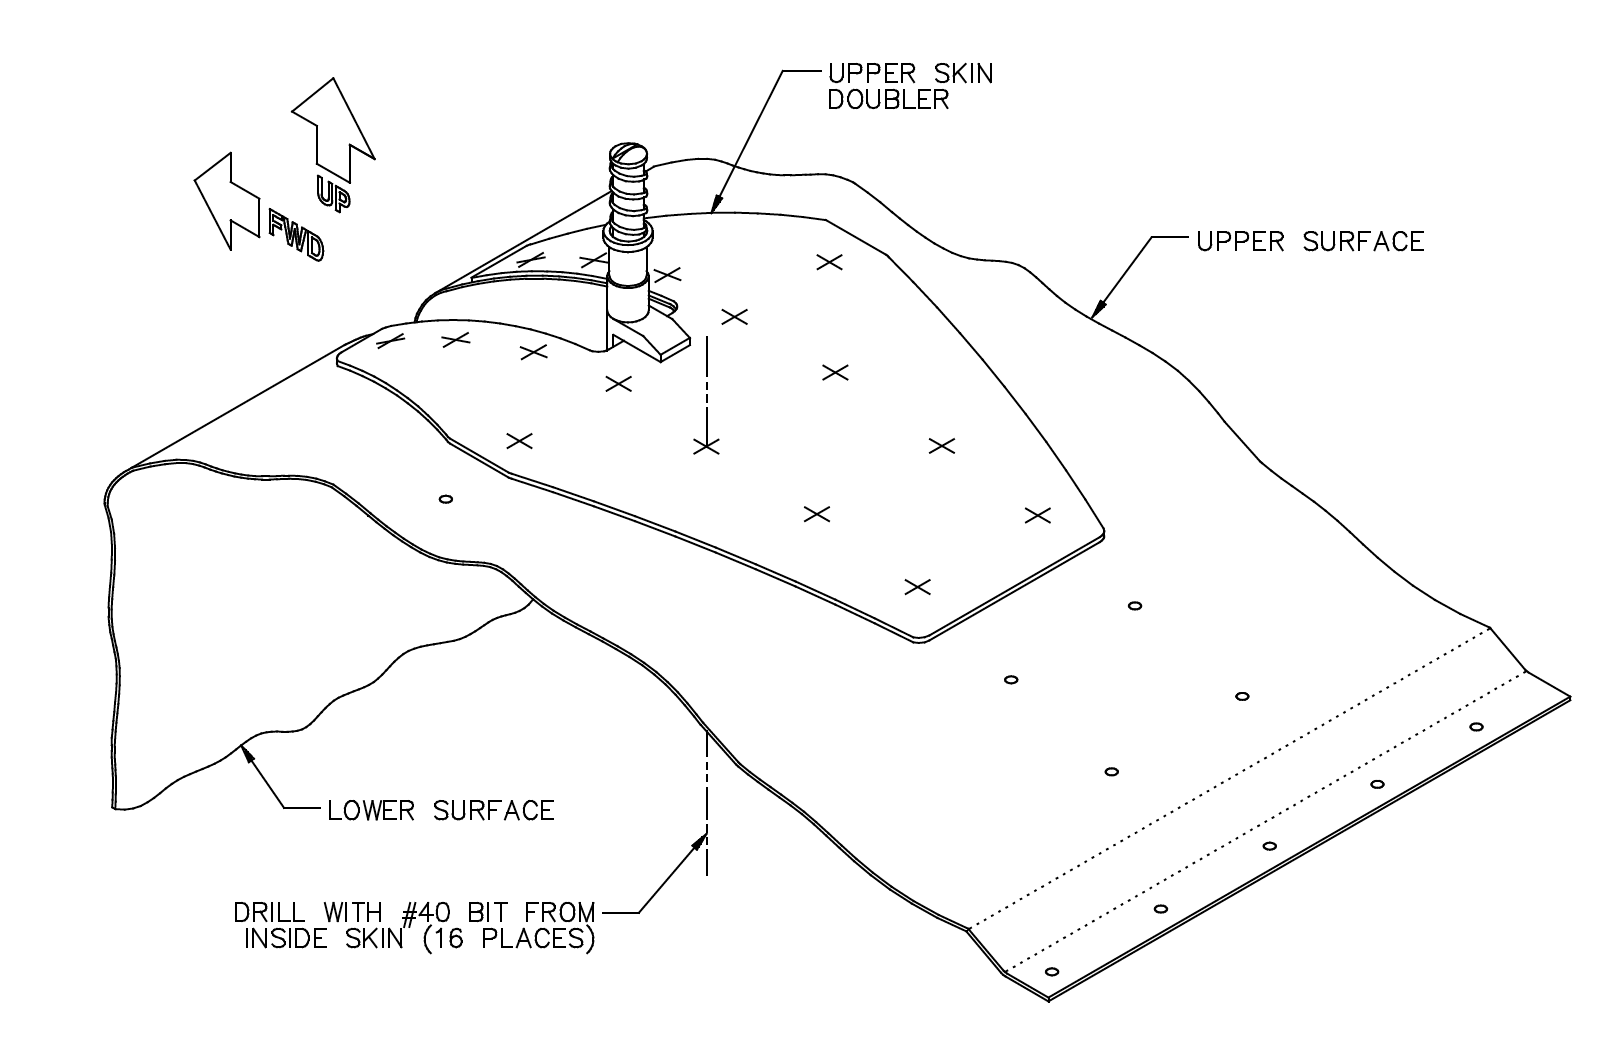
In with a big rasp and file away – my neat slots are now stepped slots because once built and riveted, you can’t get at the full slot because of the guide arms. The only consolation is that only the nosy will notice, and me, the builder, every time I do a pre flight!
This problem is easier rectified in construction and I believe the steps 54 and 55 should say “align slots in the doubler and skins, OR ensure the distances between the doubler slot and the roller bolt centers are for the top slot at least 6-3/8 inches and for the bottom slot at least 3 inches, whichever is the greater. Any protruding skin in the slot should then be removed”.(Note: these are from my “fix” and allow for approximately 1/16 + clearance – as the manual so often says, other GlaStars may differ, but this can be checked by measuring the flap track assemblies fitted to the wing-allowing for the roller diameter, of course). .
The above measurements are taken from the forward most hole in the guide arm to the top slot and the hole in the arm about half way out and on the bottom of the arm to the lower slot.
I would have preferred to have made the change at construction. Now hope I have enough adjustment in the turnbuckles to neutralise the ailerons.
The fun we amateurs have! I would rather have been at Oshkosh yesterday than wasting the two hours fixing this blunder. With a bit of checking those still to complete this may save that time!
–Kiwi Pete
Aileron adjustment: In readjusting my aileron rigging after having gotten it screwed up in one way or another, I found the following ground rules helpful, assuming that the manual instructions were followed in the original setup and that the cable lengths, crossover rod length and stops were established properly :
- Set stick in the center.
- To increase the travel of an aileron, LENGTHEN the push rod.
- To raise an aileron, LOOSEN the vertical control cable on the opposite side of the fuselage.
- To adjust the tension in the aileron control system, adjust the tension of the crossover cable.
–Al Sibley
Be sure the aileron “protractors” you make are true: They should both be the same and it is important that the origin of the angles you mark be located aligned. I used a computer and legal-sized paper to make my compass. I used the outboard end of the aileron to measure the distance from the trailing edge to the hinge point (you can see the location clearly).
Also, I found that it was necessary to have the aileron bellcranks angled inwards a bit–maybe 10 to 15 degrees. If you look at the geometry, you’ll see that the push-up/pull-down distances from the neutral position will vary depending on the bellcrank angle.
I struggled with the ailerons. After I made two identical “protractors” and let the bellcrank angle inwards, my total travel and asymmetry problems were easy to solve.
–Dennis Douglas, 5220
Prevent snagging cords in the flap ratchet plate: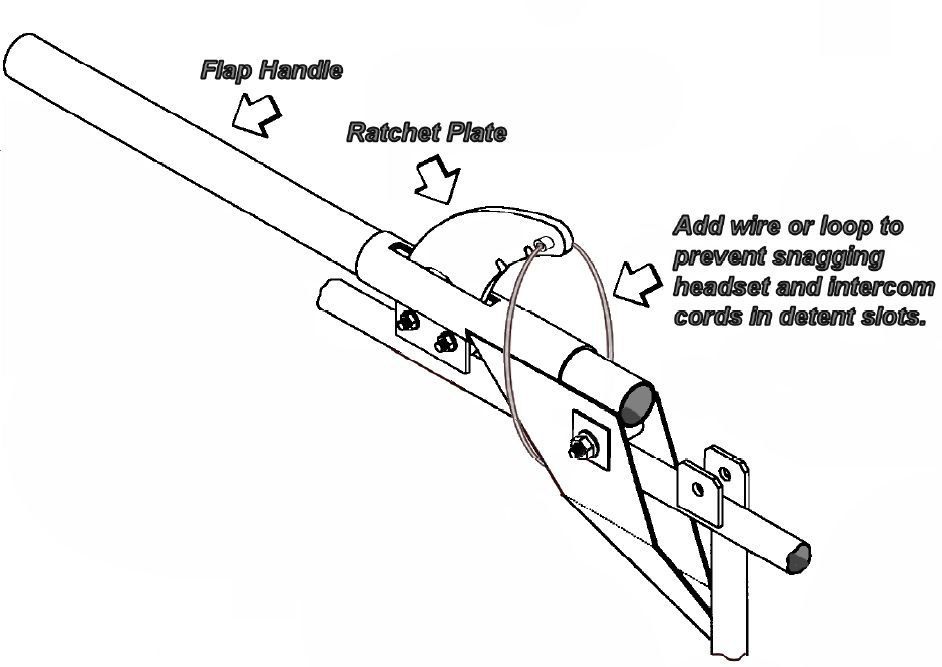
–Eric M. Jones
Aileron balancing: I had to add lead to my ailerons also and I believe everyone else will. Buy some lead and put it in a steel cup and heat it up on you gas grill. Once its melted (try not to breathe the fumes) pour the hollow square shaft full with lead and let cool. Install counterweight and if its too heavy you just grind some of the outside portion off.
–Dan Dudley


