The GlaStar is not typically built with flush rivets, but some builders are using them anyway. This does not improve aerodynamics, but helps if the wings are left in polished aluminum finish.
Ti p for flush riveters: I was able to get some AACQ4 flush, structural pull rivets from AS&S. These are quite a bit less expensive than the 100 degree cherry rivets(less than half). The RV builders I talk to say it is OK to dimple with 100 degree tools and use the 120 degree head flush pull rivets. But after doing this on scrap I did not like the way it looked. I ordered an extra set of dimple dies and had a local machine shop mill them to 120 degrees. This is a pretty expensive die set now but it works and looks great. I also ordered the 120 degree countersink tool from SH and made a female die in a scrap piece of steel for getting into the tight spots. This setup works great for these rivets. I also will not have to worry about dissimilar metals corrosion because the rivets are aluminum.
–Mark Francis
Flush riveting: We are flush riveting our ‘Star and many people have asked us about this given the fact that Stoddard-Hamilton does not approve of this. This is because, being an ethical company, they will not approve what they haven’t tested. We initially started flush riveting the tail section back when S-H said it was OK. When they changed their mind, I did some research and decided to continue with some additional safety precautions. Note: Stoddard-Hamilton does not officially approve of flush riveting the GlaStar.
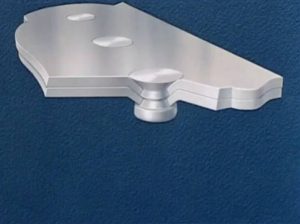
Flush riveting adds quite a bit of work and probably about $500 in expense. The extra work is in dimpling or countersinking the holes. You should also drill the holes about 2 drill sizes under when dimpling (ie- use a 42 drill, then dimple the hole which opens it up to a 40). This adds some extra effort in using the clecos through smaller holes as well. We use the spring back dimple dies from Cleveland and have already worn out two sets. They minimize distortion of the metal when dimpled.
We use a pneumatic squeezer to dimple wherever possible. We also use the dimple tools that use a nail and a rivet puller to get into the real hard- to-reach areas.
Wherever you use blind rivets, you have to use 1/8″ as I haven’t found and structural 3/32 flush blind rivets. We use the Cherry Max blind rivets (not the oversize ones!) and they work very well but the cost about 70 cents each (hence the added cost). I heard of a place where you can get them for 30 cents but the guy couldn’t find the phone number.
The extra measures I took included talking to Ted Setzer (designer of the ‘Star) and he told me that while they won’t officially recommend flush riveting that he is going to flush rivet his airplane. Their real concern was with the inner two panels of the wings. During testing, some of the universal head rivets pulled out. So they redesigned the inner portions of the wings using thicker metal and more reinforcements. He thinks it’s strong enough now but suggested using an aerospace adhesive in addition to riveting in these two areas. Another option would be to increase the number of rivets you use in this section.
I checked on the internet and an engineer found a reference book that showed the relative strength of universal head vs flush. In the thickness of metal that we use, the flush rivet is as strong or stronger in shear than the universal head if the flush rivet is dimpled. If it is counter-sunk, strength decreases.
To add an extra layer of safety, we will use 3M DP-190 epoxy adhesive between all hat sections/ribs and wing skin in addition to flush riveting on the inner two skin panels of each wing.
Some of the areas (the elevator trim tab and stab spar doublers example) will slightly distort when dimpled and this creates additional challenges to overcome. Is it worth it? I think so. I doubt that this will reduce much drag, but it sure looks nice and will make it much easier to keep clean and wax. Ever tried buffing out wax around a universal rivet head? Now multiply by thousands…
–Sid Lloyd


