Here are a few tips on building a suitable workbench and wing jig for the GlaStar and Sportsman submitted by our members.
Workbench from the wing crate
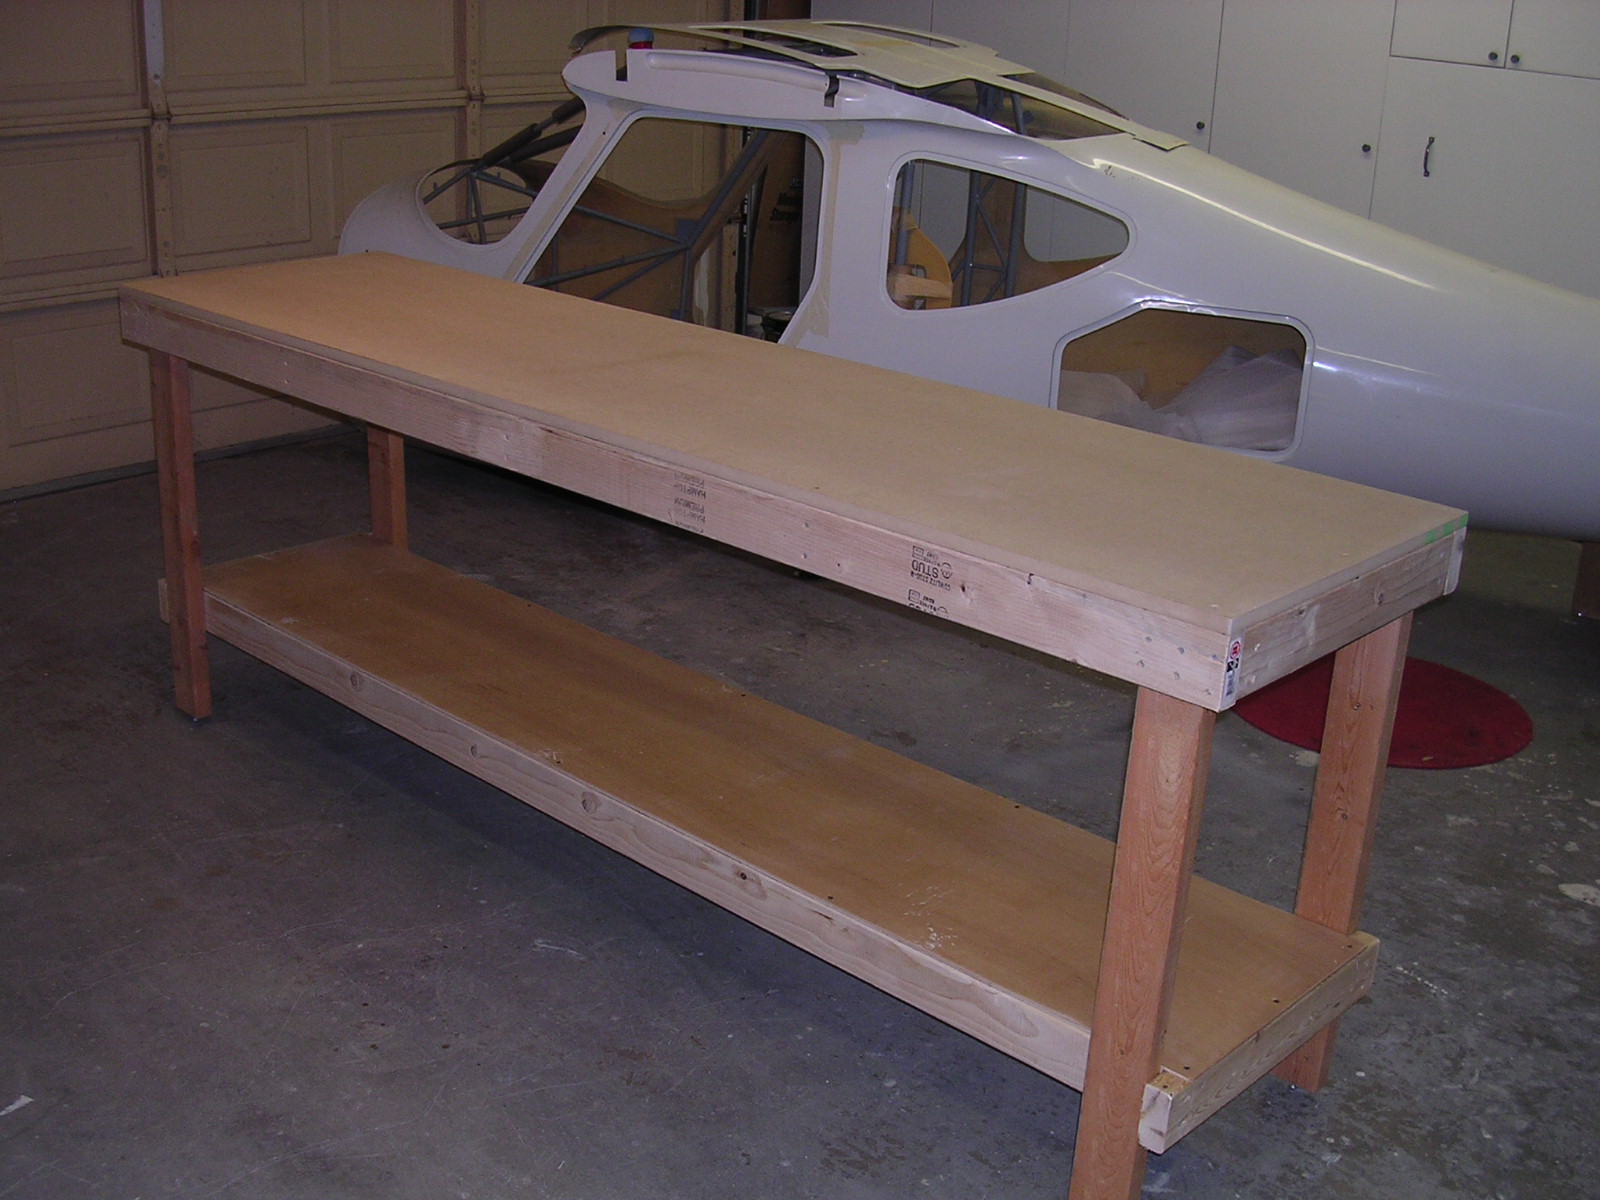
For those who want a workbench asap. In less than 2 hours we made a workbench using the wing crate which measures 113 x 33 x 13 inches.
- Carefully remove the top of the crate and the contents!
- Place a 36″ length of 3″ x 3″ INSIDE the crate at the four corners and fasten by screws inserted from the outside. Our crate was well made and the corners were plumb.
- Screw two further 36″ lengths of 3″ x 3″ halfway along the longer sides
- Turn the crate upright
- Screw a length of 3″ x 1″ along each side (4 sides) approximately 4″ above the floor.
Workbench finished… The base of the crate has become the work surface.
Further refinements:
- Nail plywood along the upper edge of the 3″ x 1″ to form a low level shelf
- Cut out several of the plywood side panels from the table (crate) and screw the lid of the crate back into place to form a high level shelf accessed through openings.
- The worksurface can by improved by nailing a sheet of MDF to the top surface.
- Add diagonals and braces as desired.
–Frank Miskelly #5577
Workbench
Things I’ve done to make the best jig I can are:
- Kiln dried wood legs and frame. Most of the stuff at Home Depot is wet except their premium 2 x 4 studs. Humidity and temperature over the long haul will have a big effect on the wet lumber that some builders use when converting their shipping crate into a jig.
- Melamine MDF 3/4″ (Home Depot) top screwed in two places at each end with a 1/8″ expansion gap in the middle. The middle section is lightly secured through slotted holes in the MDF so the frame/top can move with expansion.
- Lag screws at the bottom of each leg for leveling.
- Used the electronic level at several marked location to level entire table. The level is great since you can set it to beep when level. Leveled the entire table to “0” in 30 minutes. It hasn’t moved in 6 months.
- Uprights are 1.5″ x 3″ x 1/8 wall steel posts. They are secured at a pivot 5/8″ bolt near the table top and aligned to vertical using 5/8″ all-thread and bolt in two axis at the bottom of the table. I can retune the posts vertical easily at any time.
- Secured the end legs to the floor using “L” brackets screwed to the legs and “liquid-nails” glued to the floor.
- Cost about $200 in materials.
–Gus Gustavson #5581
 Wing jig and a workbench
I am here to tell you that you can build a GlaStar without building a 16′ double decked monster. For those of you who do wood work, enjoy it and have the power tools, it is probably the way to go. However, everyone should know that there are alternatives and just because SH shows it in the manual it does not mean that there aren’t other ways to go. People talk about building a “wing JIG” as though it was some exotic frame work. Basically in the case of our GlaStar, it is just two sturdy posts that hold the two spars in a properly spaced and aligned position. Well! I guess you could call it a jig but is a very basic set up. However, you do not have to build a huge table just to hold up two posts. I have read of securing the posts to both the floor and ceiling for support. Sounds sturdy but takes some attachment planning and alignment work and readjustment may be difficult. I also note that table mounted posts wander and shrink out of adjustment also. So here is what we used for posts (Wing Jigs). They are made from two lengths of three inch square steel that is 1/8″ thick. They are centered and welded on to a 12″ square plate that is 1/2″ thick. The plate has 1/2″ holes drilled in the corners. The posts are further stiffened with 2 lengths 1″ pipe welded to the edge of the plate and welded to the two sides of the posts.The plate is secured to the concrete floor with four 1/2″ expansion bolts. Note: rent a concrete drill to make the holes in the floor. When you finish with the jig, a little concrete patch material will make the holes disappear.
There are various ways to fasten the spar attatch angles to posts. We purchased two lengths of overhead lighting support “U” channels and spot welded them to the side of the posts. Special plate nuts fit into the channels. This gives you the ability set the vertical height of the spars and to level them. You will have to rivet a 6″ triangle to each spar jig angle so two fasteners can be used at each positon to keep the Assy. from twisting. and losing alignment settings. Note: These holes should be oversize to allow some extra fine adjustment. The height of the posts should reflect the heighth of the people doing the work. Eye level for the forward spare seems about right. How about adjusting the posts for verticle? Just tap a carpenters tapered wood shims under the low side of the floor plate (next to the hold down bolts and then crush the wood down by tightening the bolts until you reach verticle. Makes the job very easy.
How about a table. Buy two 8 foot folding tables. Check the folding design. Some are stronger than others. They cost about $40. each. Place them end to end. At your local Home Improvement store, buy two 8′ sheets of good quality, fine grain pressed wood sheets. Have them cut to width. Allow a couple of inches of overhang on the side of the the tables so you will have room for clamps (unless the table itself already has enough overhang available). Bolt the press wood to each table with 6 counter sunk 3/16″ bolts with large area washers on the bottom. Secure the tables together along each side with suitable pieces of wood using nails or screws. Level the table legs as needed to give an overall straight and level table. Now you have a 16′ table with very little work and not much cost. If you feel the need to improve or strengthen the table further, have at it. Its easy to improve something that already looks very good.
Note: No table is perfect, purchased or built. Check parts being built for straight and shim up from “any table top” to arrive at straight and true. When you finish your tail feathers, flaps and ailerons, you can disassemble your tables and fold them up for storage. As we built the wings, we used one table to mount our Avery dimpler and riveter fame into the middle of it (flushed the tool with holes in the middle of the table). The table top makes a perfect support for work. The other table is used to lay out work for making wing parts. When we are through in the evening, we just flip it on its side and slide the legs under the wing. Now there is room for the family car. We do not want our car to have to sit out side for years while we hog the whole garage for our GlaStar. We are glad not to have a permanent table under our wing. It’s a lot easier to work on the trailing edge of the wing. Riveting the cove ribs and other parts is easy with the gun man on a wheeled stool. Of course, single man riveting would have to be done with the lower spar removed and laid on a table.
Well! This gives you new starts something to consider. Building a wooden bench jig is a big job before you ever unpack your kit. Steel posts would be easy for some and daunting for others, depending on your personal skills.
–Orville Eliason


