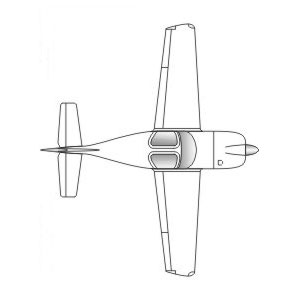
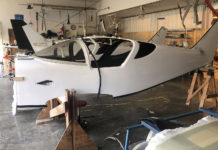
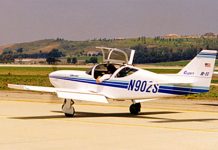
This is a follow-up to the earlier article about the upgrading of the Glasair one wing. Just as the G-I wing can be upgraded using the components and ideas from later kits, so too can the fuselage.
One of the simplest and structurally beneficial additions is the addition of two unidirectional stiffening bows used in each side of the Glasair II aircraft. 
The first unidirectional bow reinforces the wing cutout area. This bow is installed in the foam core area just above wing cutout. Installing this bow on each side will eliminate the need for the 6 layer laminate fuselage to forward wing stiffening angle (shown in the later sections of the G-I Final Assembly). This wing cutout stiffening bow can be fabricated in place and should be approximately 3/4″ wide in the middle and flare out at the ends.
The second bow is installed just below the cutout for the gull wing doors. This stiffens the fuselage to compensate for the strength lost cutting the doors from the fuselage shell. This second bow is approximately 3/4″ in width and 60″ in length and is centered under the door cutout. This bow can be fabricated in place by cutting an appropriate sized channel in the inner skin and foam core. The channel is then filled with successive layers of unidirectional cloth until the channel is filled. The inner skins are then patched with a 2-layer bidirectional laminate layer.
Another fuselage upgrade that has been very popular with G-I builders is the bonding on of the wing to body fairings. The techniques used on the later Glasair kits can easily be adapted. The bonded on fairings will stiffen the fuselage as well as fit the wing and fuselage more tightly.
Some of the other G-II features, which could be incorporated, but with more effort, would be to fabricate a cowling attach flange on the forward end of the fuselage. The present instructions have the builder use pieces of aluminum angle bolted to the forward side of the firewall. Creating a fiberglass firewall attach flange before installing the firewall will create a stronger more durable cowling attach method.
Those builders installing the fire barrier upgrade per Addendum 15 can take advantage of the more recent methods of attaching the forward aluminum fire barrier closeout sheet.
Several builders have asked about using the latest gull wing door latch and hinges on the G-I. The upper fuselage contour is slightly different which makes use of these hinges impractical. The latch kits have been installed but this takes a significant amount of work enlarging the door frame to accommodate the required installation dimensions of the newest style overcenter door latch parts.
Several builders have also asked about using the screw and nutplate method of attaching the fuselage (underwing) belly panel rather than the present piano hinge attachment. This has not proved practical since the fore and aft size of this G-I belly panel is shorter than the later aircraft. Because of this shorter size installing a flange (necessary to mount nutplates) on the fuselage creates a shortened opening making installation of the wing in the fuselage impossible.
Another G-II feature which has been very popular is the addition of the Dorsal Fin. This simple fiberglass part is easy to install and gives the airplane a bit more of the P-51 look.
This is likely not a comprehensive list of upgrades. The old company Stoddard-Hamilton Aircraft had a separate Options Catalog Addendum just for the Glasair I. Although copies of this catalog are no longer generally available we can make copies of pages that have items G-I builders may be interested in.


I understand Glasair still sells propellers for the Glasair 1 with the Lycoming I0-360 180 HP.
Is this correct?
Check with Glasair Aviation directly for pricing and options: support@glasairaviation.com.