This tip was submitted by Tom Lempicke. Modifications to the fuel system can lead to serious consequences, so be sure you know exactly what you are doing if you decide to change your installation from the design specified in the Assembly Manual. As with any modifications, you assume all responsibility for the safety of the aircraft.

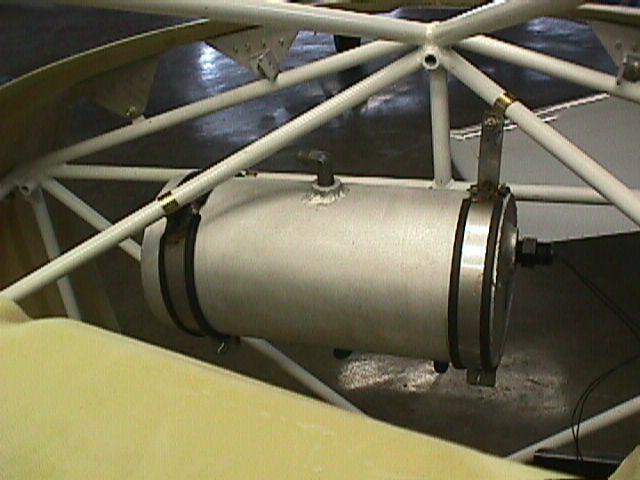
We have come up with a piece of aluminum tubing that was part of a Kolb Firestar kit. It is 6″ in diameter and .060 wall. 610x aluminum and quite weldable. We cut off a piece 12 inches long and have welded two 1/4″ NPT fittings in the bottom and one in the top. Two discs of .060 aluminum will make the ends.
I just got off the phone with Aircraft Spruce and they have a low fuel level indicator for $30 that fits into a 1/2″ NPT hole. They are sending it along with a welding flange, which I plan to weld into one end of the cylinder. This should give us just about 1.5 gal. of header tank. When I talked to Tech Support yesterday the felt that about 1 gallon was the right amount to have in the header.
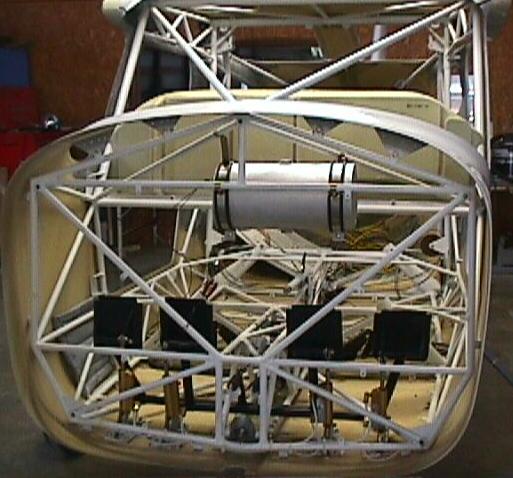
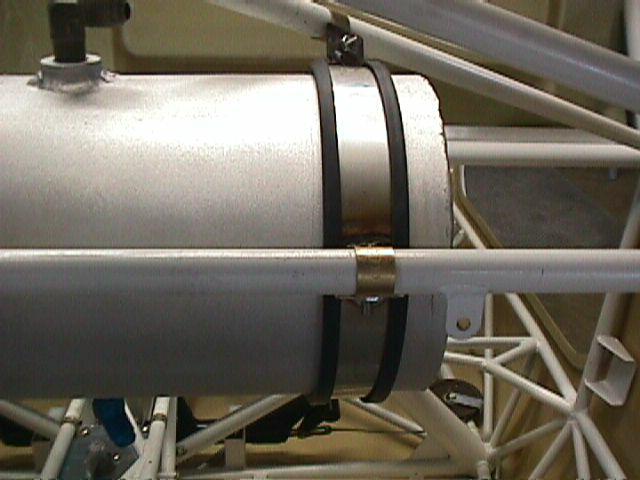
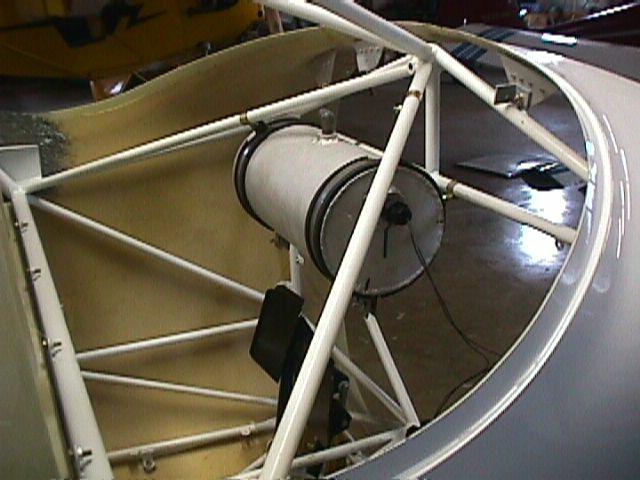
We are going to mount this with straps. Aft of the firewall, at the top and just under the diagonal tube that runs under the glareshield. The leftmost side seems to be a location where radios etc. should not pose a clearance problem.
- Fuel warning system PN 6905-400
- Warning light PN 05-17660
- 1/4″ welding flange PN AN867-2
- 1/2″ welding flange PN AN867-4
The tank is 12″ long by 6″ in diameter. Should hold about 1.5 gallons. It is made out of 6106 alum. with a .060 wall. The end pieces are of the same material. Mounting straps are from AS&S and made out of 1″ stainless material. The rubber is also sold by AS&S.
We discovered that by putting the welding flanges in a lathe and removing most of the outside flange we got a neater and lighter job. A better welder than I could have probably knocked this thing out in a morning. Notice that we installed our panel. This was to determine that the radio stack will not interfere.
In use the fuel from the tank will port into the bottom starboard fitting. It will exit out of the bottom center fitting. The tank has no corners or other places for gradu (Gradu is a good Suthrun word!) to hide. Air will leave through a 1/4″ line at the top of the tank and will be ported to the left main tank at the fitting that was installed for the return line. The black device on the starboard side of the tank is a level switch that (Hopefully) will make when the tank level drops by about 1/3. We intend to test this and will have exact numbers at a later time. We anticipate that when the light comes on we should have about seven minutes of fuel in level cruise.
We plan to test this system by connecting the fuel lines and using a transparent line for the top of the tank and see what really happens to the air bubbles. After we get done I will remove the tank, dry it out (In my wife’s oven when she is not at home) and paint.
The light comes on after 41 ounces of fuel have been drained from the tank. The engine flames out 137 ounces after the light comes on. If the pilot then selects a tank with fuel it takes 5 seconds for fuel to begin flowing in an amount that would light the fire once again. It then takes 3 minutes and ten seconds before the light goes out. less than one minute from the time the light goes out till the tank is full and the vent line fills with fuel. Free flow fuel rate from the system is just under 50 gallons per hour. For test purposes we used clear plastic vent line rather than the aluminum that will be in the final installation. We purposefully put a low spot in the vent and it created no problem at all. The vent line runs up the left side post forward of the door, alongside the pilot’s head on the outboard side of the cage and thence via a rubber tube to the 1/8″ pipe port on the top of the left tank. Testing was NOT done using the fuel tank. (I feel I can get the water out of the lines and do not want to introduce water to my tank.) By selecting the opposite (Not full) tank we introduced bubbles quite a number of times into the header. It gets rid of them quickly with no problem at all.
–Tom Lempicke


