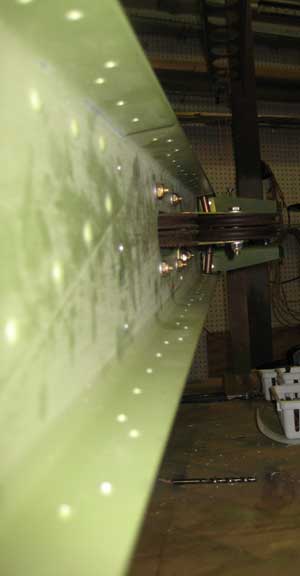
 There is quite a bit of manufacturing tolerance in the spar assemblies. My aft spar was a good .10″ shorter than it should have been. There is nothing that you can do about it until Danny comes up with his spar stretching service. But it should not be a problem.
Both spars on the other wing had quite a bow in them. A call to SH revealed that they allow .015″ per foot which on a 16’ spar is almost 1/4″. Enough to be noticeable and not easily corrected. You can probably take some of it out by riveting the skins on the concave side of the bow first. That is probably all that I would do besides learning to love a wing with a slight swoop in it.
SH says you can take your rivet hammer and run it up and down the concave side whacking the dickens out of it, but I think you stand a good chance of ending up with a shape that you like even less than a slight bow. If a guy wanted to try that, Ottumwa is a good place. You can try it on some one else’s airplane.
–John Top
Jump-start spars: For those who haven’t yet purchased a kit, wing or full, you’re probably considering the preassembled wing spars. I decided not to take advantage of the Jump-Start option. The assembly of the spars is straight forward, albeit time consuming. (The 30 hour time savings noted by S-H is conservative.) Obviously, most builders are satisfied with the Jump-Start Option–nothing wrong with that. Many want to take the shortest path toward completion with flying a.s.a.p. as the primary goal.
If, instead, you’re interested in what your spars and doublers look like BP (before primer application), building them is well within most everyone’s abilities. (The wings are my last sheet metal components remaining to be built, and I’ve found the spar construction to be relatively easy.) After all, the do-it-yourself construction process, true to the homebuilt philosophy, is intended to be educational (and fun?). The major task is smoothing all components. Though the unfinished spars arrived pre-drilled and pre-cut, there were many subtle and not-so-subtle flaws: tool marks, scuffs, nicks, voids, and inclusions.
- Items for consideration if you choose to build the spars-
- Finish cut areas carefully. Check everything–stress risers should be reduced to a minimum.
- Cleaning, treating, and priming the spars is no fun. This is my least favorite part of building anyway, but the size of the spars aggravated the process.
- The 5/32″ rivets used to assemble the doublers are among the largest in the Glastar and require more air pressure on the rivet gun. A 3X gun would make this task easier.
- A drill press comes in handy when reaming the wing attach holes.
- Finally, don’t be in a hurry. The wing spars are critical components and mistakes could be costly, ($$ or otherwise).
–Scott Fifield
Installing strut beam doublers: When installing the strut beam doublers on the forward spar, refer to page 55, calculate the necessary distance needed between the spar flanges and the edge of the strut beam doubler. This dimension can be easily increased to allow the reinforcement cap strips #36 &37 to nest all the way forward to facilitate better edge distance for the rivets. Unfortunately I did not realize this until well into the wing, and have corrected my problem by milling .060 groove in the 36 inch reinforcement doubler. Without doing this, edge distance is minimal on the doubler strip.
–Danny – GlaStar Component Services


