Step 27: If your kit includes the upper shell attach fittings pre-made with all holes predrilled, as mine did, when doing the final installation, drill out the holes in the shell for the bushings before drilling any of the bolt holes. Place the fitting (w/ bushing in the hole) on the bed and drill through the predrilled fitting holes.
–Paul Hansen
Hard point filler: Alter the use of Qcell (same as Micro) for making attach hardpoints in fuselage shell. I don’t think it is strong enough. When I did a few sample holes and then attached bolts through them. the outer skin or gel coat depressed very easily and cracked around the hole! Not acceptable to me. I went back in and and tried to rout out the Qcell, but was unable to. After consulting several other builders (Lancairs, etc.) I made a decision to use flox, a cotton fiber filler, which makes a very hard attach point. Also, by putting a bright light against the shell on the outside I could see the void I’d routed out, and when injecting the resin/filler I could see whether or not I had any voids. The filler was reddish in color, distinctly different from the rest of the shell. It also made a “wet looking” circle in the void area on the inside layer of laminate, as well as being reddish in color.
–Paul Hansen
Step 53: In establishing line for rivet holes, I found that the curvature of the fin caused the straight edge to slide a bit. BE SURE to measure 3-4 places along the edge for dimension “x” as well as top and bottom. I used the edge of my tape measure clamped to the fin shell which I could “bend” a bit to fit the curvature. (Without this procedure, you are likely to get the rivet line too far aft in the center area and too close to the edge of the spar flange.)
–Paul Hansen
Qbond hint: Where a qbond (micro) bed is called for in the fuselage assembly; I recommend the following: instead of waxing the brackets (such as aft fus strut brackets, various rudder brackets, etc.) cover the bracket with heavy duty clear package sealing (cellophane) tape( and over any gap between paired brackets). It makes a neater installation, less bed waste and weight, and easier cleanup of brackets for final installation. Easy release too! Keeps it out of the holes and joints. Also recommend that all such pads be made with at least some milled fibers or flox for extra strength, if the pad is over 1/16 ” thick.
–Paul Hansen
Outer shell finishing: I think it is a necessity to apply 1″ fiberglass tape down the entire seams of the shells on the exterior below the gelcoat level. Without this tape over time your finish could develop surface cracks along the seams (non structural only cosmetic). If you are trying to achieve a superior finish this tape in conjunction with a small amount of faring compound on the exterior is a must. Faring compound formulation which I have compiled over the years for best results and flexibility are as follows: 1) first application of faring compound consists of West System Epoxy and microspheres 85% and cabosil 15%. This results in an easily sanding mixture. 2) second application of faring compound consists of 75% microspheres and 25% talc. This results although slightly heavier because of the talc in a mixture that will yield a smooth surface. This should only be used in a thin layer on top of your first application.
–Dan White
Tab attachments to the fuselage shell: Micro spheres are inadequate as a filler for any compression loads, therefore I would recommend using a product from West Systems called 404 High density filler. This has excellent compression characteristics and in conjunction with West Systems Epoxy is far superior to the described method in the SH manual. I also noticed a problem with the utilization of the prescribed washers under the tabs, when the fasteners have been installed they tend to pull the shells against the tabs even if the tabs are not parallel to the plane of the shells. This results in a deflection of the outer skin which in some cases can be very noticeable. My method of attaching the tabs was to use high density filler inside the shells step: 19 then also placing high density filler under the tabs to shell gap. After this has cured I would re-drill the hole thru the tab and shell, when installing the fastener I used a slightly thickened West System Epoxy/high density filler in the hole and on the fastener, this increases the withdrawal strength of the fastener considerably and also eliminates any movement or loosening of the fastener in time as it works in the hole.
–Dan White
Rudder spar opening: prior to glassing the top seam of the shells, cut a wood plug that represents the width of the rudder spar at its lowest point and temporarily position this to hold the shells apart while glassing. If this is not done it would result in having to apply undue force to insert the rudder spar at a later date. This plug also should be in place when all bulkheads are being positioned and glassed. Similarly a plug should be cut in the location of bulkhead E prior to glassing bulkhead D.
–Dan White
Fuselage shells alignment: when positioning the cage within the shells a very small movement of the shells along the seam line fore and aft can be translated into a very large misalignment of the entire assembly. Do not assume simply by aligning the joggles at either end and on top that you have achieved proper alignment.
–Dan White
Holding the shells together: a simple method for holding the shells together prior to glassing is to cut (10″x4″) strips of 1/8″ or 3/16″ plywood and after temporarily holding the shells together with packing tape these pieces can be spray contact cement (3M # 90 ) to the shells for very precise positioning of the seam.
–Dan White
Cage alignment: step: 22 and step:23 Should be accomplished at the same time you are lining up the fuselage tabs and positioning the fuselage within the shells prior to drilling any tabs.
–Dan White
Fuselage strakes: SH says sand the gel coat off the fuselage and strake flanges by hand – don’t use power tools for fear of damaging the fiberglass. The gel coat is tough stuff. Don’t waste your time or fingertips using 60 grit sandpaper, it will take you what seems forever to remove the gel coat. Only after the first strake was sanded when I made my what seems daily trip to the local True Value Hardware, to pick up some 36 grit paper. Its like sanding with gravel but it sure removes the gel coat much quicker.
–Dan Dudley
Windshield installation: When you get to the point of fiberglassing in the closeout of the wing root of the fuselage and the top deck. I would recommend using the 3″ DBM tape, instead of just a layer or two of cloth. Secondly, and most important. You should trial fit your windshield BEFORE you glass in the above, or it won’t fit!!! Basically try to completely fit the windshield first. Then you can see where you need to adjust the top deck/fuselage and bring it to fit the windshield.. Much easier than ruining a windshield by putting it in stress. I found that the bottom of my fuselage wing root was a little lower than the wing itself, and had to heat and adjust it.
–Paul Hansen
Fuselage hard points: When you are filling the hard points for the shell attachments to the cage, it is useful to use a 10 ml disposable syringe which does not need a needle. Becton Dickenson makes a syringe which has a nice extension which is just the right size for injecting the resin into the drilled holes; BD part # 1604. It is probably available at most pharmacies. If not, a laboratory supply store should have it.
–Tom Eggers
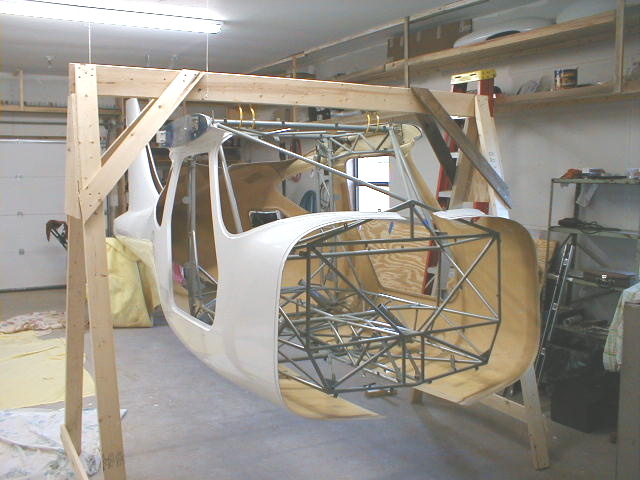
When to assemble your fuselage: I finally have the fuselage halves attached to the cage and the belly seam glassed. Thanks to all who responded to my problem of getting the belly seam to come together. I was given a number of dimensions to measure from several builders and from Bruce at S-H builder support.
All measurements that I made indicated that everything was as it should be. Yet, my fuselage just wouldn’t come together along the belly seam. Finally, I gave up and went to bed, leaving tension on the three cargo straps that I had been using to try and pull the fuselage together. I was delighted to see the next day that the gap in the belly seam was narrower. I tightened the straps a little more and left it for another day. Over a period of five days I was finally able to get the belly seam puled together.
After taping it together I was able align everything perfectly without needing the straps any longer.
I can only conclude that after almost two years in storage, the fuselage halves had deformed slightly to where they no longer fit properly around the cage. It was a tedious process to gradually pull them back into shape.
Lesson learned:
If I was to do it over again, I would mount the fuselage to the cage and lay up the seams first thing while the shells were fresh from the factory molds then go on the the tail feathers, wings, etc. As an alternative I would at least route out the gear leg and wing strut attach point on the fuselage and strap the fuselage halves securely around the cage so that they would, hopefully be less likely to deform from improper storage over time.
–R. Mike “Jake” Jacobson #5326


