Bulkhead layups: On my last trip to Germany, I purchased special brushes designed for painting behind radiators. They are about 18″ long with the bristle end bent at a 45 degree angle. They are perfect for the long reach layups on the bulkheads. I have had some success bending cheap brushes and taping then to long handles. I always cut the bristles to about 1″ length. This makes stippling much easier.
–Jim Siebel
Fuselage step 68, installing bulkhead D: Hint (and this is crucial) Make sure this is square, (the method in the manual is inadequate) . Just flopping a tri-square back and forth is not good enough. (I know, because mine ended up not square and I had to make a flox & micro bed on one side almost 1/4″ thick to square it up.) The way to get it square is to use the procedure outlined in step 79: measure from the wing strut attach lug to the front edge of bulkhead D before glassing it in. You will get very close this way. Don’t wait til you are installing the stabilizer. (I ended up with my whole stab 1/4″ further forward than needed. I was able to make it perfectly square [i.e. so that dimension X is within 1/16″ of each other] but bulkhead E had to be 1/4″ forward too and that made the spread on the aft of tail not as great and thus not fit the tail cone as well. So I will have to cut and modify it a bit to make it fit. It will be fine in the end, but needless extra hassle that I hope all of you can avoid.)
–Paul Hansen
Installing bulkhead E: If I were to install bulkhead E again I would do it a bit different and here is why- Service Bulletin 14 instructs you to grind off the foam on the forward side of the bulkhead and then install the bulkhead if you have not already done so. This effectively leaves you with a bulkhead that is just 2 pieces of bi-directional glass as most of the bulkhead. When I did this I had a very hard time getting the bulkhead in place and squared up as it was so flimsy. This is made more difficult by the bulkhead needing to distend the shells for the tail cone to fit properly. I ended up making some jigs to hold the shells apart and after the bulkhead dried it was not square as it had bowed slightly in the vertical direction. (opposite direction from my jigs) In looking back at this I think the best thing to do is install the bulkhead before the foam is ground away. That way the bulkhead is still rigid and the foam can be ground off after the bulkhead is installed and the aft cloth is glassed into place. This would make it much easier to get the bulkhead square. BTW, I used cabosil instead of Q-cell to install bulkhead E. The extra weight used by the cabosil should be insignificant, and it should be stronger structurally with the cabosil.
–Rhett Westerman
Handling Service Bulletin 16 (bulkhead E redesign): I recommend a slight variation in the way of doing the SB 16: 1) Cut the entire fwd face off the bulkhead. a) Use a Dremel with a small ball rotary cutter: Cut all around the outside perimeter just through the fwd glass face. This will release the entire face. b) I used a 1″ wide wood chisel then to start at the top and peel off the entire face. c) Use same chisel or smaller to chip and scrape all the foam off the bulkhead. (I ended up with only a 2 x 3″ piece left, so took it all off. This makes it much easier to glass the bulkhead. 2. Cut DBM Tape: a) make a cardboard pattern of the E bulkhead. Then use it to cut your DBM tape strips. It takes one and a half widths of the DBM tape to cover the bulkhead. Use your original tape if possible, rather than the tape sent with the remod kit and instructions, which is a little narrower than the original tape and will not cover the bulkhead as well (using 1.5 widths) b) Glass as instructed, but alternate the joints of the full and half width strips to make it stronger. 3. Use full cover of the regular glass now, rather than strips around the perimeter. It will be stronger. 4. If you have cut the hole for the elevator push rod, you may need to provide some kind of backing over that hole so the wet glass does not push through or deform. Good luck!
–Paul Hansen
Bulkhead D attachment hardware: the washers used on the aft side of bulkhead D to attach the stabilizer positioning bracket while adequate can be improved upon. By combining these washers into one backup plate you will increase the withdrawal strength and eliminate movement of the fasteners over time without point loading and possibly crushing bulkhead D by over torquing the fasteners.
–Danny – GlaStar Component Service
Step 79 Position bulkhead E : In the third paragraph the dimension which is given 3.6″ is incorrect and should be corrected to read 3.45″. This will yield a 1.5 degree down at front angle on the horizontal stabilizer. This dimension also needs to be corrected in Step 81. Please bear in mind that the above is second hand information from Cal in technical service and there is some question as to the reason why SHAI has not corrected this very important dimension by issuing an ANR.
–Dan White
Bulkhead D foam removal: I have observed in several kits that in the positioning of bulkhead D that the area where the foam is removed from the fuselage to facilitate glass to glass contact with bulkhead D attachment is misplaced. This results in the forward lamination for attaching bulkhead D to the hull to only make contact with the glass surface on top of the foam. In my humble opinion this results in the transferring of loads from the bulkhead to the hull to be diminished. As described in the ANOR For bulkhead E the foam needs to be ground away to reveal at least 1inch of outer shell surface. The inner laminate needs to be replaced prior to installation of bulkhead D.
–Dan White
Inspection hole plug fabrication: When making the plug for the inspection hole in the tail between bulkhead C and D: 1. Bevel the perimeter of the remaining plug cut with a hole saw the way you want it. 2. Cover the edges and a little on to both surfaces with clear cellophane packaging tape. 3. tape the plug in place with the seam aligned properly. with the clear tape on the bottom of the plug and fuselage. 4. Fill the gap around the plug with resin/flox/mill fiber mixture. 5) When set, remove plug, remove tape, clean up, and sand the inner edge a bit to remove any sharp points (to protect your arm when inside!) And you have a perfect fit for the plug. (Note this is in lieu of trying to bevel two edges to fit as suggested in the manual.)
–Paul Hansen
Bulkhead A tip: If you have not gotten to bulkhead A, it is recommended acquiring a 30″ x 30″ piece of smooth sheet metal or masonite or similar, then applying a wax to it before laying up this bulkhead. This is more work, and possibly expense, than necessary. Here’s another way.
If you have a flat, but not smooth surface, try this. Acquire a 36″ x 36″ piece of clear mylar from an fiberglass supply shop. Lay down your template sheet (it helps to unfold this early and roll to get the folds out as much as possible) and tape the corners to your flat surface. Lay and tape the mylar on top of the template. Then build the bulkhead layup on top of the mylar. I did mine by presaturating the full length of DBM strips, laying up the other sheets between those. When you lay out the saturated cloth, the template outline shows through the layup. Use peel-ply over the top if you wish and let cure. Before removing from the mylar, remove the peel-ply and trace the template outline, still visible, onto the layup. The bulkhead will then lift from the mylar with a glass smooth surface on the contact side. Trim with a metal cutting blade in a scroll saw. Showed this to Cal Spangler this past week. He seemed to like the idea. The mylar I purchased from Fiberlay in Seattle is about $.65/sf.
One other note on this bulkhead, make it oversize on the outer edge if you plan on building a floatplane. The recommended modification may be to trim the foam from the inside shell walls 1 in. either side of the bulkhead as was done for some of the tail bulkheads. The bulkhead will then be laminated in with direct glass to glass contact. Confirm this approach with Cal/Ted Setzer before doing, or wait for the official word.
–Doug Windhorn #5370
Bulkhead B installation: To put the thick resin/Q-cel on the aft side of bulkhead B, I obtained (from a friend) a blank calking tube and filled it with the thick stuff. The calking gun added just enough length to allow me to apply a nice bead around the bulkhead and the fuselage. I also added an extension to a “tung depressor” to aid in the application. Sure glad that “B” is now history.
–Jim Rose
Bulkhead B tip: One caution — make sure there are no pressure applied by the bulkhead to the sides of the fuselage — it will be noticeable on the exterior when you are done — a loose barely touching fit is excellent. I had to remove my fillets because and redo it because we did not know about this.
–Doug Windhorn
Bulkhead E width: Bulkhead E template is too narrow. If E is bonded per the template, it makes it very difficult to impossible to install the stabilizer because the tail cone flanges won’t allow the rear spar attach flanges to slide horizontally past. It needs to be 1/4 to 3/8″ wider.
–Ted Setzer
Bulkhead D warning: Bulkhead “D” needs to be installed squarely and securely because it supports the horizontal stabilizer through the h-stab attachment bracket. When measuring the for the fore and aft position of the bulkhead, I found that the correct position of the bulkhead was right up against the forward end of the relieved area (i.e., no foam) in the tail. The 2/18/98 ANOR says that while the inner glass and foam could be relieved forward of the bulkhead to allow the bulkhead to be glassed to the inside of the outer glass layers, that “this is not strictly necessary”. WRONG! Since the ANOR said that removing the inner layer of glass and foam was “not strictly necessary” I did not do so. When I tried to install the horizontal stabilizer support bracket, however, I found that I could not center the bracket because the foam-plus-glass inner layer (over on the right side) prevented the bracket from being positioned properly. In other words, the thickness of the fuselage forward of the now-installed bulkhead was too great to allow the bracket to be centered. A call to SHAI revealed that, “we shoulda’ worded that ANOR differently to indicate that the inside MUST be removed to create the edge band…” They anticipated my problem and responded that they had the same problem on the prototype they were working on there and that it WAS necessary to remove the inner glass and foam. So the tip here is that when you are installing bulkhead “D”, if your bulkhead needs to be installed at the forward edge of the relieved area, ignore the part of the 2/18/98 ANOR that says you don’t have to remove the inner layer of glass and foam, and remove an inch or so. Even if you don’t need the structural strength afforded by bonding to the outer layer, you need to remove the inner layer to to gain sufficient lateral room to be able to mount the horizontal stabilizer support bracket.
–Dennis Douglas
Bulkhead E installation: I deviated a bit from the manual instructions and I was quite pleased with the result. Agree with Dennis – you have to grind away the sidewall foam to get that inch of clear glass, as per the manual. I wasn’t too impressed with the idea of glassing in the full template “E” then grinding out an inch all round the side. Seemed to me the space was pretty confined and I’m not a fan for awkward working where I can avoid it.
Find the motorised sidegrinder works well on fibreglass – but not in confined spaces! What I did was first to grind out and reglass the sidewalls. I then made bulkhead E as per the manual, but then ground it down to size so it was a FIRM fit in the right spot. I then marked out and ground out the inch clearance round the sides and the 2 inches, I think it was, along the top. I also took out an inch or so hole for the pushrod, which goes through the now rather small area of foam left. The bulkhead is then a bit flimsy, but not impossible.
I cleaned and prepared the area for glassing, then after greasing the pegs for the bracket on D, (to ease later removal), fitted the horizontal stabilizer in the bracket and checked it for trueness by measuring the tips to the lower strut attach points, then eased in the remains of bulkhead E behind (forward) of the ears on the rear spar, and then with a string thru the pushrod hole held it against the ears by including a light spring on the string and tying it in line aft of the tail (my freestanding wing jig was conveniently in line and a couple of feet away). The spring held the bulkhead in place and I then q celled the fillet on the aft side of the bulkhead. This held the bulkhead in place when next day I VERY GENTLY removed the horizontal stabilizer. I then glassed the two layers of bi-directional cloth on the aft side. This really secured the bulkhead in place and I was able then to, without any fiddling round, do the inside q cell fillet, the bi directional cloth and the layers at the top behind the ears. I also did the strengthening for the tailwheel installation. It was a breeze.
If I was doing it again, I would, when seaming the bottom of the fuselage, check the alignment of the fuselage side at the tailcone joggle. During the above process, because the sides were not parallel, I had to include a spreader at the top to straighten this lack of parallelism – it was a dratted nuisance and got in the way. The end result was a slight bow in the sides between bulkheads D and E. This would be easier and more successfully done when seaming the bottom fuselage joint.
The other point to watch – four nutplates are attached inside the bulkhead to hold the h-s through the ears – do your best to finish the last layer of glass as smooth and level as possible bearing in mind the fitting of these nutplates.
Maybe the routing out of the inside two inches of the bulkhead is not too much trouble, but doing it as I did it was quite simple – just a procession of glassing episodes. I found it easier not to be too greedy and try to do too many layers at a time. Incidentally, I went on at the same time to do the supports for the shearweb (which also get in the way of nutplates) using the half side plate I had used for the forward shearweb. Had a real session glassing in that area all at once!
–Kiwi Pete
Using plastic for shearweb layup: The Builder’s Tips section already describes how to install the C/D inter-bulkhead shearweb without cutting a hole in the lower aft fuselage. One useful piece of information not in the tips is to use a perspex or Lexan former when installing the side attach angles. This allows direct visual control when installing the fiberglass angles. i used a piece of perspex (Bill Wilson used Lexan) equal to the shearweb cut longitudinally in half. Without the hole in the fuselage builders will have to install nutplates all round. Will probably use the same system for D/E shearweb.
–Frank Miskelly
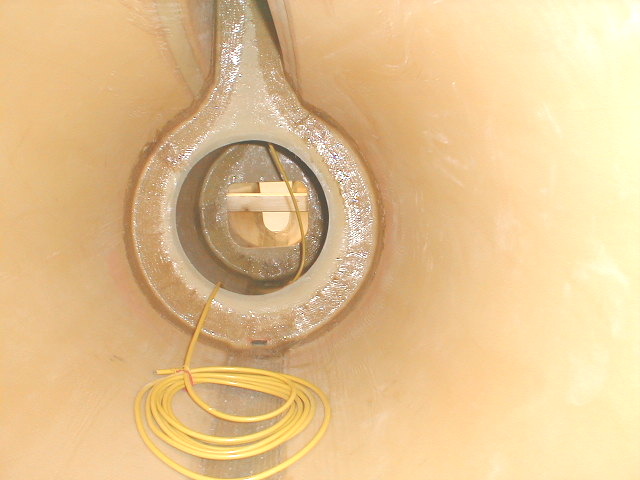
Need tailcone inspection hole? – all of the discussion seems to be centered on the tail cone hole as a means of access for fabricating the shear web flanges. I did these using the hollow perspex former as in the builders tips. However later on I used the hole in the bottom as a means of access when completing step 181 in final assembly [elevator control stops] and also as access to the rudder lower hinge bolt when removing the rudder to fit the wing fold attachments. The other reason I opted for the hole was as a means of inspecting the various fittings in this area with out removing the shearweb each time. I did add a layer of DBM tape around the hole as a reenforcement.
–Ken Wickland


