- Version
- Downloads 497
- File Size 5.05 MB
- File Count 1
- Create Date January 13, 2017
- Last Updated December 5, 2023
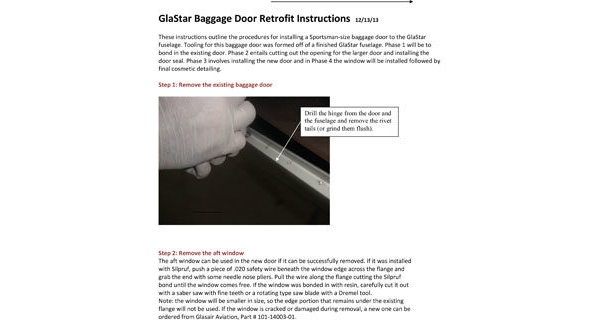
These instructions outline the procedures for installing a Sportsman-size baggage door to the GlaStar fuselage. Tooling for this baggage door was formed off of a finished GlaStar fuselage. Phase 1 will be to bond in the existing door. Phase 2 entails cutting out the opening for the larger door and installing the door seal. Phase 3 involves installing the new door and in Phase 4 the window will be installed followed by final cosmetic detailing.
Designed and produced by Ted Setzer.
Advertisement
Attached Files
| File | Action |
|---|---|
| GlaStar Baggage Door Retrofit Instructions Rv5.pdf | Download |